
Contents

The Nikon ZR cinema camera has begun arriving in filmmakers’ hands. I got mine late last week and thought I’d share a few initial impressions.
First off, be aware that this is only the first of a series of articles I intend to do on the new Nikon ZR cinema camera. I got a chance to have a very brief look at a pre-production model a couple of months prior to release, and that was enough to convince me that it was a tool I needed in my kit. I immediately placed a pre-order and my personal unit arrived in the mail late last week. I haven’t yet had a chance to put it into a professional scenario, so today I will focus on the things that are easy to identify and project once you have the camera in hand. I’m planning to use this as a B-Cam to my RED Komodo on an advertising campaign in a couple of weeks. I’ll circle back after that to do a full “how does it perform in the field” test. But I have spent the past weekend doing a litany of mundane tests to search for any red flags or to figure out its best use in my own workflow. This article will relay some of those observations.
I’ll give you a brief outline of my use-case to start. I am a director/DP and still photographer. My work spans both narrative and commercial work. I own a RED Komodo, which is my primary video tool (when not renting larger bodies like the Arri Alexa). I own a pair of Nikon Z9 cameras, which are my primary photography tools. I didn’t buy the ZR to replace either of those. Rather, I bought it to supplement what I already have. A camera that can be a backup/B-cam when shooting with my Komodo or a dedicated video/gimbal camera when shooting with my Nikons. Or, as I’ll explain later, a camera setup that can include all four simultaneously with workflow enhancements granted by the linking of the two brands. With that in mind, here are the pros and cons immediately evident when taking the camera out of the box.
Size Matters
The small size of the Nikon ZR is an absolute game-changer for me. As someone who is frequently working with fully rigged high-end cinema cameras like the Alexa or the Sony Venice II, and whose still bodies are both built-in-grip battleships that weigh a ton, I really, really appreciate how small and light the ZR is. Perhaps it’s because of my advancing age or perhaps it’s because my perspective toward my work has gradually shifted, but I no longer feel the need to always be carrying the biggest and most visibly impressive kit available just to prove my worth as an artist. In fact, I’ve been actively shifting my mindset to reset my focus on what actually matters — storytelling.
And if I’ve learned anything from my years reviewing cameras for this site, it’s that you don’t need to spend a lot to get a great image. There are creature comforts, some of which I will discuss in a second, but when it comes to base image quality, we are spoiled for choice. If you know how to light, compose, and work with your talent, you can create great art with pretty much any tool in your hand. So, why not make that tool as small as possible?

So, as I’ve built out the “ZR backpack” in my overall kit, what has immediately jumped out at me is that this is going to be the camera I’m most likely to pick up 90 % of the time. Obviously, on large client work or on jobs that demand more, this might not be the case. But for everyday cinematography, running lighting tests, run-and-gun, one-man-band filmmaking, or even a quick zoom call, this is the camera I’ll be reaching for.
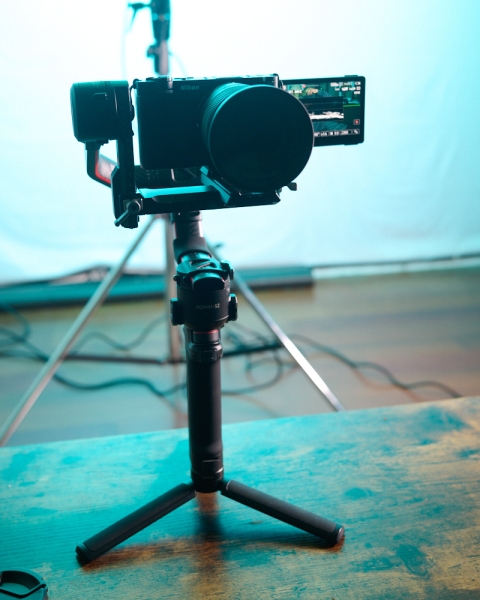
I mentioned that I’ll be using it as a B-cam to my Komodo on an upcoming campaign. The light size makes this camera perfect for gimbal work. Even someone like me who absolutely hates gimbals—primarily because of my own inability to balance the camera in a reasonable amount of time—can balance the ZR in two seconds. So I see it becoming pretty standard for me to have my Komodo on sticks and my ZR on the gimbal side-by-side. The increased efficiency on set is tangible. But even if it’s a full day of handheld work or using this as an A-cam on documentary or low-profile narrative work, the small size of this camera makes me want to pick up this camera as opposed to having to pick up some of the larger bodies. A small but important difference.
R3D NE
A main reason I can use this camera in combination with my other RED is because of the R3D NE implementation. It is important to note that the ZR records R3D NE, not the standard R3D you might find in other RED cameras. Also, you get 12-bit color as opposed to 16-bit. So that is worth noting. Shooting both side-by-side though, I have to say that, in terms of practical application, the difference is something that most of the time will not be a major detriment. There is definitely a difference. But if the trade-off is being smaller and more portable versus those four extra bits, I’m going to be okay with that trade-off on most occasions. Again, there are times when it absolutely will matter. But in my own use-case, which I listed above, 12-bit R3D files are more than enough. And having spent the weekend shooting test footage and pouring over it in DaVinci Resolve, the footage it produces is truly amazing.
File Size
Speaking of R3D NE files, this is an area that deserves consideration. If you’re not used to working with R3D or raw video files, you will likely get sticker shock when you realize just how much storage is required. This isn’t specific to the ZR. This is just something to consider when shooting raw video.
I have a 1 TB CFexpress Type B card. Setting the camera to R3D NE at 6 K gave me about one and a half hours of space. If you are shooting relatively short takes or clips, this won’t be an issue. If you are shooting extended interviews, events, etc., this could be a consideration.
Beyond sheer file size, there are also a few more interesting twists to the story. Knowing that R3D files would be large, I set up the same test to look at the relative amount of recording time I would get when using N-RAW, ProRes RAW, ProRes 422, or 10-bit H.264. I was expecting there to be a large drop-off by choosing an alternate format, but interestingly enough, N-RAW and ProRes RAW gave me the same one and a half hours recording time. ProRes 422 actually gave me less time — one hour and twenty minutes (at the max resolution, which is less than 6 K). H.264 gave me a full two hours. Alternatively, if I shot R3D NE in 4 K instead of 6 K, I could get two hours out of my 1 TB card.
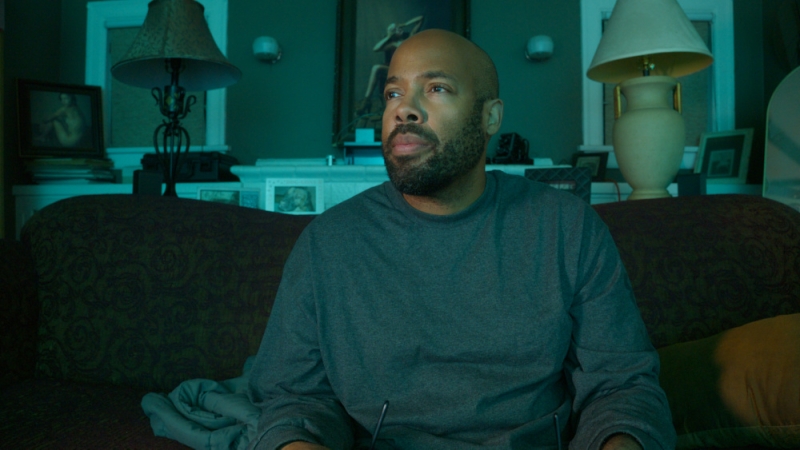
Image Quality
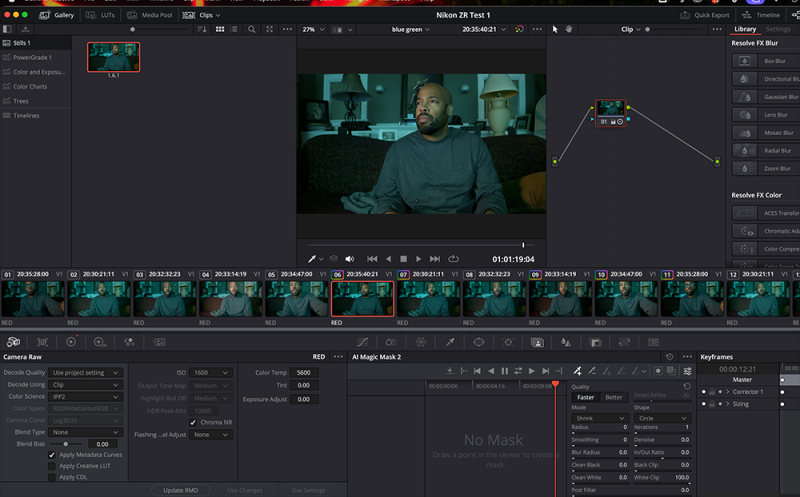
There are a lot of lab tests being done by far more technically oriented reviewers than I, so I’ll let you get the hard numbers from them. But one thing I did do was to shoot footage with all of those formats and bring it into DaVinci Resolve so I could look at the scopes to see what was going on.
The raw formats all seemed to perform well. There was a clear advantage to the raw formats over the H.264/H.265 formats in terms of image quality. So I do think that, if you are thinking about getting this camera, you should plan on shooting in one of the raw formats pretty much all the time. The exception would be ProRes 422 if you have a quick client turnaround. But as I mentioned, this actually used more space than the raw formats, not less, so the only real benefit is quick turnaround or ease on your computer during the editing process.
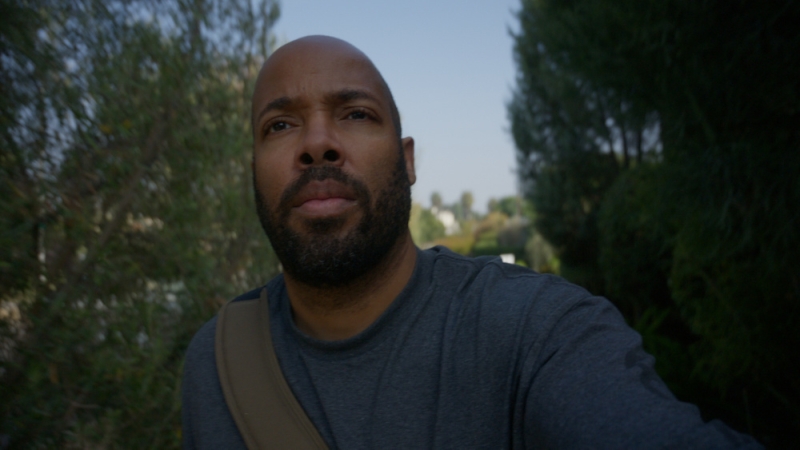
Original exposure
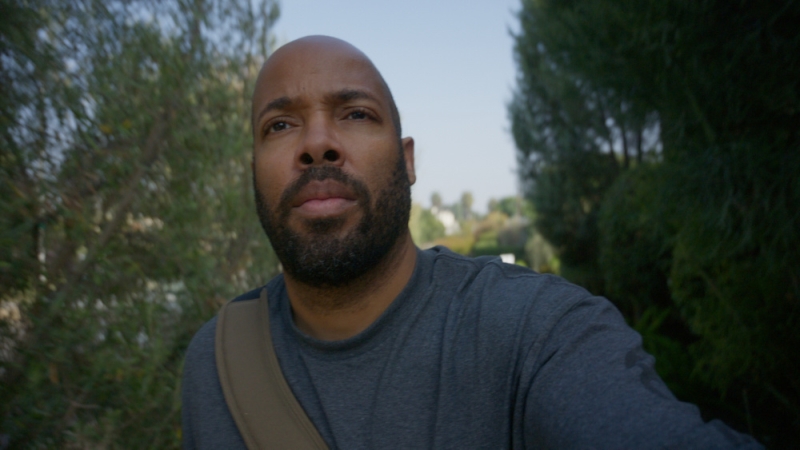
Two stop bump in Resolve
Again, I didn’t do extreme tests like over- or under-exposing by 28 stops to see if I could pull it back. I’m mostly interested in my practical workflow where it’s unlikely I’m going to be under or over more than two stops at any given moment. But I did try some higher-contrast scenes to see if I could pull detail out of the shadows and/or hold my highlights. All of the raw formats performed well under those scenarios. I do think most people buying this camera will be using R3D NE. But I specifically wanted to perform this test because it means that if I were using the ZR alongside my Z9s (or Z8, Z6III), I could shoot instead in N-RAW to match those other cameras without feeling as though I am sacrificing quality.
Prior to launch, Nikon was saying there are 15+ stops of dynamic range. Early reports seem to suggest this might not be mathematically true based on lab testing. But as I said, I am not someone who does lab tests. I just want to know, in practical terms, is there enough dynamic range for my own needs. And at least in my initial tests I think there is more than enough.

Versus The Z6III
Speaking of pairing this camera with other Nikons, one thought that did jump out to me as I really started to handle the Nikon ZR Cinema Camera was that there are more comparisons to the Nikon Z6III than I had originally imagined. The Z6III is an excellent camera. And while that camera is more of a hybrid camera and the ZR is being branded as a “cinema” camera, there are subtle differences and similarities you’ll want to consider when making your purchase.
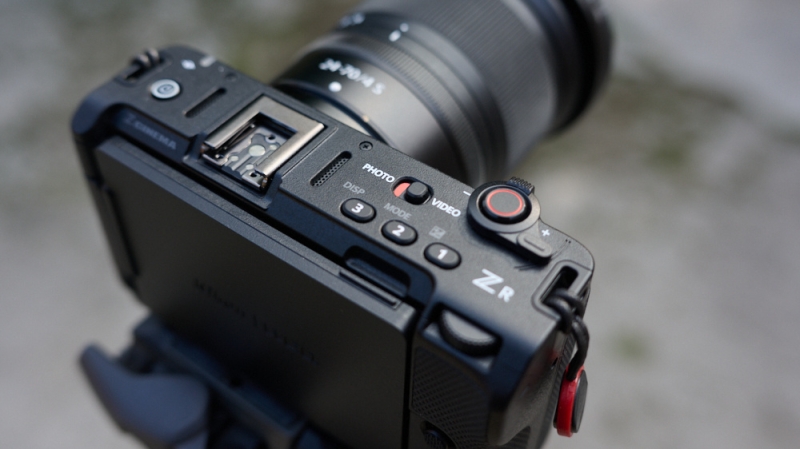
The main difference between the two is that the ZR offers R3D NE, internal 32-bit float (which we will discuss more in a moment), and that big beautiful 4-inch LCD screen. Conversely, what the Z6III gives you is a full-sized HDMI and an EVF. Which is more important to you will 100% depend on your individual use-case.
For me, because the Nikon Z9 is my primary still/hybrid body, I’m okay giving up the EVF on the ZR in exchange for the other benefits of the camera. I’m not really using the ZR as a hybrid body. I’m using it only as a video option. But, if I were looking for a hybrid body, the Z6III may still be a better choice. As someone who is far too old and grumpy to ever consider shooting serious stills without an EVF, that is simply essential if I were planning to use a tool for photography. The ZR has all the same specs on the photography front as the Z6III, but it is absolutely not designed with photography in mind. This is a cinema body. It says so right there on the badge.
32-Bit Float
Where the ZR really does pull away from the competition though is with the internal 32-bit-float audio. I’ve been using 32-bit-float field recorders for years. It has been a massive breakthrough as I am often tasked with recording my own sound on-set. And, while I am perfectly trained in setting my levels, the more attention I pay to sound, the less attention I have left for visuals and performance. 32-bit-float audio has allowed me to rest easy that I’ll have enough headroom in post if I don’t 100% nail my levels and has been crucial in terms of efficiency.
The ZR takes that efficiency one step further. Having 32-bit-float built directly into the camera has allowed me to move my field recorder to the back of my kit instead of needing to pull it out every time. To be clear, there will be times when I need to record separate tracks of 32-bit-float and want to use my premium audio setup. I’m not throwing out the Zoom F6. But, for all the times I need to shoot a quick interview, film myself talking for a YouTube or promo video, or simply am capturing audio from one actor at a time, I can now leave my field recorder at home and record 32-bit-float in-camera already married to my footage. This saves space in my bag. Keeps things tidier on-set because I don’t have to worry about where my field recorder is. And it saves me time both on-set and in post because I no longer need to sync the files and match timecode. Honestly, perhaps more so than the R3D files and other features, the internal 32-bit-float audio may actually be the biggest efficiency improvement this camera has to offer.
Pair it with the Hollyland Lark Max 2 and you have 32-bit-float audio all the way through the audio chain. I ran a number of tests with the built-in mics, the Nikon ME-1D Smart Hot-Shoe Microphone, and the Lark Max 2 lavs. Everything sounds great. But the Lark Max 2 + the ZR is an amazing pair.
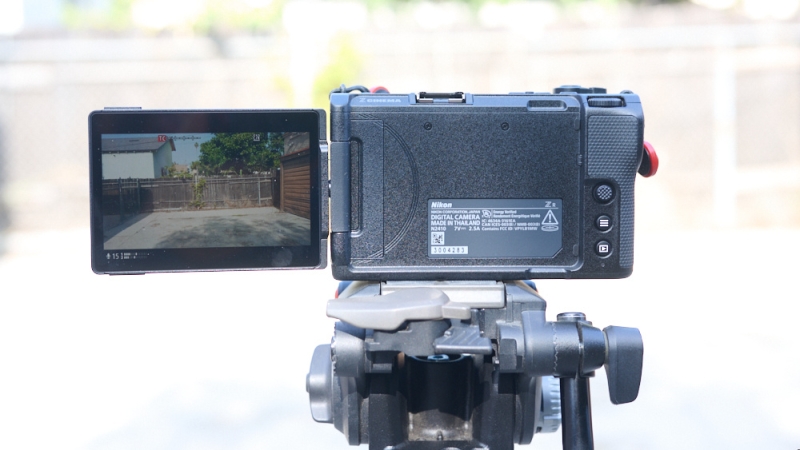
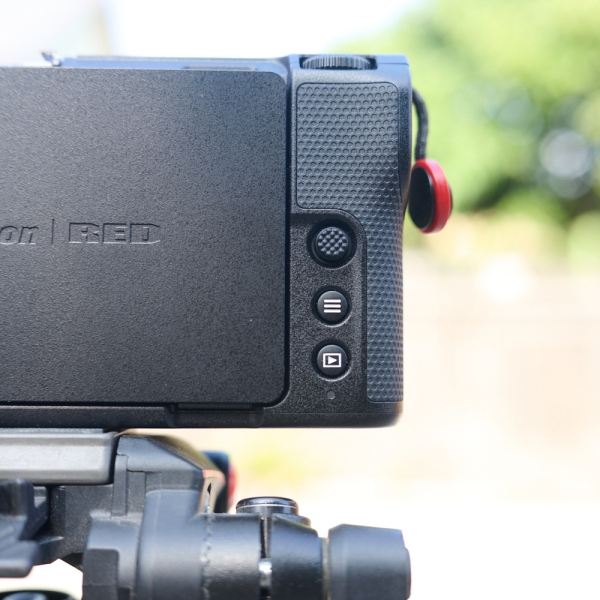
4-Inch LCD
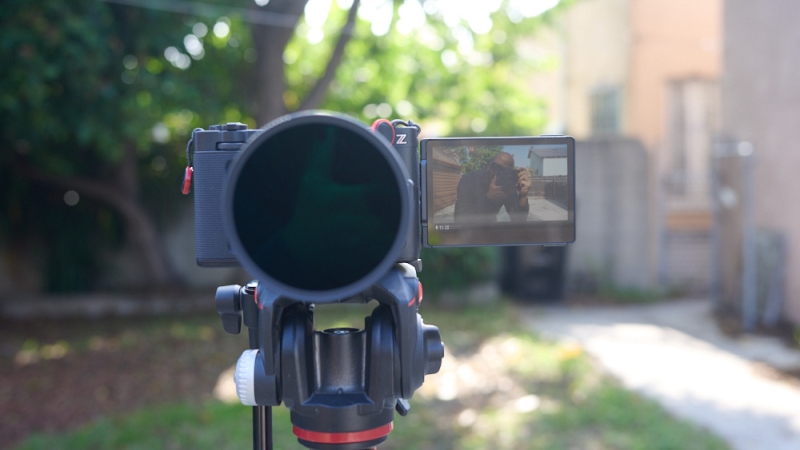
I just sold off my old Atomos Ninja V monitor last week. It was in perfect working order. But, I wasn’t using it. Why? Because, unless I absolutely have to, I would rather not mount an external monitor when filming. The 4-inch LCD on the ZR (versus the 5-inch Ninja V) means I really don’t need an onboard monitor.
Now, if I am on-set with a full team and I need to send a signal out via a transmitter, that’s a different story. In fact, that leads to one of my biggest gripes with the camera. That darn micro-HDMI port. I know they need to keep the camera small, but I’ve broken so many micro-HDMI ports in my life that I’m worried that it’s just a matter of time before this one gets me too.
Again, because of my specific use-case, it’s not the end of the world. This is a camera expressly purchased because it’s small. It’s not the camera that I’m likely to want to overly rig. But there will be times I’m going to want to transmit a signal to a team member, and having to depend on that micro-HDMI port doesn’t fill me with glee.
Still, having the 4-inch LCD screen does mean that, when operating solo, I can comfortably leave the monitor at home.
Also, on a side note, I did take the camera outside in bright daylight. Sometimes this can cause visibility issues with an LCD, but I didn’t have any trouble seeing the image. As I mentioned, I’ll put this to the test more in the upcoming articles, but, for now, visibility on bright days doesn’t seem to be a major problem.
The Size Can Be A Blessing and a Curse
I’ve already said how much I enjoy the small form-factor of the ZR. But that does come with a couple of caveats worth mentioning.
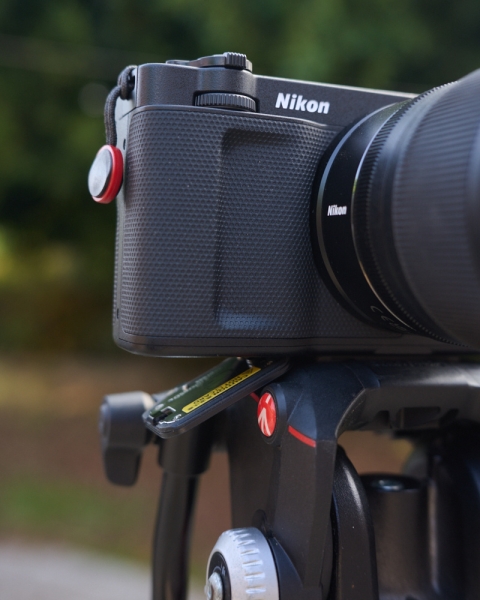
Aside from that micro-HDMI port, Nikon has also made the choice to put the card and battery compartment for this camera together and access it through the base of the camera. Again, this makes some sense I think given the form-factor. But, as I anticipated when I first saw a pre-production model of the camera a few months ago, even in my testing this placement led to me spending far more time than I would like having to take my camera all the way off the tripod/gimbal to change out my card. This won’t be much of an issue if you are rolling handheld without any rigging. But almost any rigging at all will involve the base of the camera, and needing to take things apart to change the CFast card is no doubt going to have an adverse effect on efficiency.
Also, as a result of the small size, I’m not 100% in love with the small joystick that you use to navigate the menu system. It totally works. But I did find my big clumsy fingers struggling at times to quickly get to where I wanted to be in the menu. I definitely got there. But my fingers did get tired, and I usually needed to default to the touchscreen.
Speaking of tired fingers, I also think this is a camera you are definitely going to want to use a cage with. I’ve ordered the SmallRig Cage for Nikon ZR, but have not yet received it. Because I am all-in on trying to build a minimal rig, I am pairing the ZR with the smallest Nikon Z-mount lenses I can find. The balance has been excellent, but I can easily see how this might not be the case with anything longer than, say, the Nikon Z 24-70mm f/4 S. Even with a small setup, my fingers did get a little tired trying to hold the body. Not because it is heavy—it’s super light. Rather, there isn’t really a very substantial grip on the camera. So depending on the size of your lens and your hands, you may want to get the small-rig cage purely to get more purchase on the handle of the camera to make it more comfortable.
The other reason I ordered the cage is because, for a cinema camera, you’re likely to need more mounting points, both around the camera body and at the base. Again, I don’t want to build this up too much. But I will want to add maybe an additional cold-shoe. And, more importantly, add more mounting points at the base to keep the camera from spinning when mounted on a tripod/gimbal. It only has a single mounting screw and a locator pin placed off to the side. A cinema camera needs two mounting points down the center to prevent your camera from twisting right to left when mounted with a single screw. Nikon really should have built this into the base of the camera. But now I’ll need to add a cage to increase stability. The current setup is more aimed at photography users as opposed to video professionals.
They Need a Redesigned Cinema Menu
Continuing on from the last point, I have been a Nikonian for 20 years. I know the menu system like the back of my hand. So it all makes sense to me. When Nikon started getting into the video business a few years ago, they started expanding their menu options to accommodate hybrid shooters. So far, so good.
But while the menus feel well laid out for hybrid cameras like the Z9, Nikon Z8, and Z6III, they seem less logical when put into a purely cinema body. Simple point: going through the custom settings, you have to scroll past several photo-oriented sections before you get to the single video section at the very bottom. Again, this makes sense with all the other Nikon cameras. But since, as I mentioned earlier, this is really not a camera for photo-first users, the video options should, at the very least, be moved up front. I might take it a step further and suggest they develop an entirely new cinema menu for cameras like the ZR that places the things that matter most to filmmakers up top while burying most of the photo-oriented tools deeper in the menu system.
Another note on the menu system: the camera is set up so that the Menu button takes you to the I Menu. But then you have to hit something on the I Menu to get to the full proper menu. It’s not the end of the world and likely a result of keeping the camera small, but that’s taking me a second to get used to since I’m so used to being able to quickly access the menu via a fixed Menu button on my other Nikons.
A Couple Things to Consider for Firmware 2.0
Some things, like the single mounting point and micro-HDMI port, are just facts of the camera. But there are a few things I’d love to see added to the ZR via firmware.
The exposure tools are excellent in the camera, but there is room for improvement. Specifically, I’d love to see false color. As a current RED Komodo user, I’d also love if they could somehow incorporate RED’s excellent goal-posts and traffic-lights system. I think that would give users coming primarily from RED cameras (not just lifelong Nikonians like me) an easier transition.
Also, if this is going to be a cinema camera, they have to find a way to integrate anamorphic desqueeze into the monitoring system. I’m pretty sure both the exposure tools and anamorphic support are possible with firmware updates, so hopefully that is part of Nikon’s roadmap.
Speed
One thing they have not skimped on is autofocus speed. The body uses the same sensor as the Z6III, and autofocus performance is similarly stellar.
One thing you can’t miss is how fast this camera boots up. Even compared to other Nikons, and especially compared to the marathon it takes the Komodo to boot up, the ZR is basically instantaneous. If you are a documentary shooter or content shooter and you want to be ready to shoot at the drop of a hat, this is a major plus.
Lens Flexibility
The Nikon Z-mount is the largest (physically) camera mount available. This means that you not only have access to excellent Nikon lenses, but you can also adapt pretty much any lens ever made from any brand to your Nikon ZR. So if you shoot with PL-mount lenses, E-mount, F-mount, whatever, there’s a great chance that you can use them with your ZR.
This is also a good place to mention the utility of the zoom switch on top of the ZR. This is clearly there to make for seamless integration with Nikon’s line of power-zoom lenses. But even without a PZ lens, I’m finding that switch super useful. Essentially, it allows you to zoom in quickly to check critical focus before you shoot. No menu-diving. Just flick the switch and it will zoom in. Since you are likely to want to adapt manual lenses to the ZR at some point, this is a massive time-saver.
Timecode
I do wish the camera had a dedicated timecode port. But as some may not know, Nikon has been implementing a Bluetooth timecode setup across their cameras for the last several years. This is key to me because I’ve always been able to link together both of my Z9s and my Zoom F6 and Zoom F2 via Bluetooth without any cords and maintain consistent timecode using the UltraSync Blue. Adding an UltraSync One physically connected to my Komodo means it also runs on the same timecode as the other four devices. The ZR can tap into the same chain, meaning I now have four cameras and one sound mixer (plus the lav sound recorder) all connected together with identical timecode without any cables.

Pros
- Image quality
- 4-inch LCD
- R3D NE (and N-RAW, ProRes RAW, ProRes 422)
- Internal 32-bit-float audio
- Small size
- Boot speed
- Autofocus
- Timecode via Bluetooth
- Z-mount
- Price
Cons
- File size
- Micro-HDMI port
- Battery/card slot on the bottom
- No anamorphic support (at launch)
- No false color
- Single mounting point on the bottom
- No physical timecode port
Conclusions
As I write this I am looking over at my Nikon ZR mounted to a lightweight monopod a few feet away. All I can think is, “Wow, that’s a small kit.” And I know that the totality of the package is going to make my life so much easier by allowing me to continue my R3D workflow in a smaller, more portable package (with autofocus). With the large 4-inch LCD and built-in 32-bit-float audio, I’ve already eliminated two bulky items (monitor and field recorder) from my kit. Because of the internal RAW formats, I can comfortably leave my larger cameras at home on more occasions.
I was recently listening to a pro DP discuss how having to physically carry around a large camera system can lead to physical fatigue. Physical fatigue can lead to mental fatigue. Mental fatigue means less ability to use your brain power for creativity. It’s not that you can’t shoot something amazing with a massive rig, but now it is easier than ever to get an amazing image without breaking your back—or the bank.
At just over $2,000, the Nikon ZR is an amazing value. It’s not a perfect camera. I’ve mentioned some of my own minor gripes above. But it is an amazing start to Nikon’s “cinema” camera line, which I can imagine will only continue to expand and improve as time goes on. And, right out of the box, the ZR is already proving it is going to be a major workhorse for me that will well exceed the price tag.