
Contents
- 1 What Is Wildlife Photography?
- 2 Getting Started with Wildlife Photography
- 3 Choosing the Right Gear
- 4 Understanding Wildlife Photography Settings
- 5 Techniques for the Field
- 6 Ethics and Safety in the Wild
- 7 Where and When to Shoot
- 8 Post-Processing Your Wildlife Shots
- 9 Exploring Styles and Subjects
- 10 Common Challenges (and How to Overcome Them)
- 11 Wildlife Photography Ideas and Inspiration
- 12 Tips for Beginners
- 13 Related Resources and Next Steps

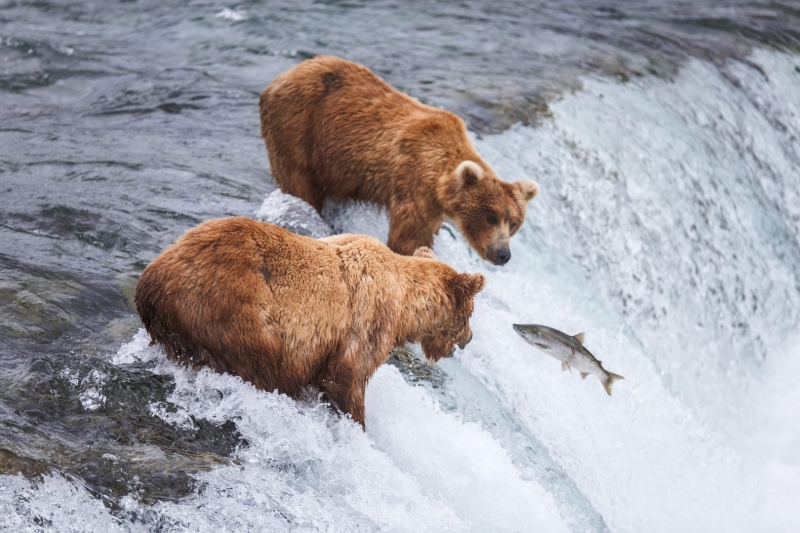
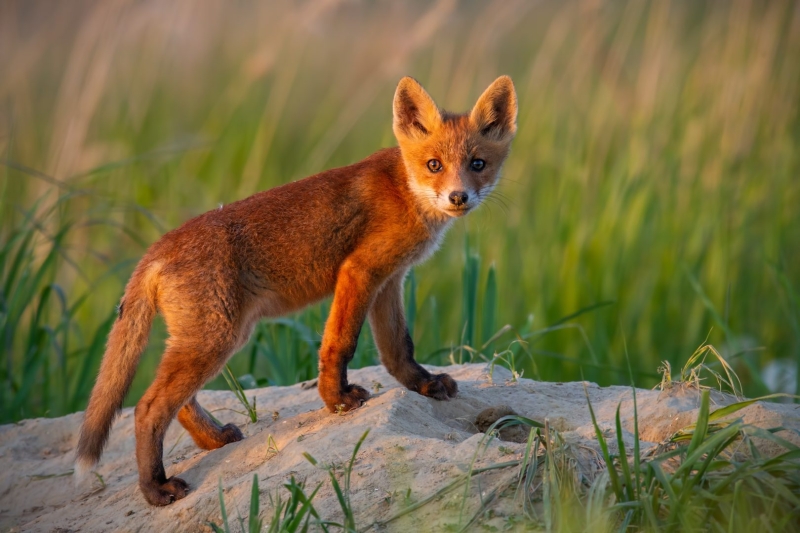
Wildlife photography is one of the most challenging yet rewarding genres out there. There’s just something magical about observing and freezing a wild animal in time: a lion mid-roar, a bird in flight, or a fox pausing just long enough to lock eyes with your lens. It’s not just about having the latest gear (though that definitely helps); it’s about patience, timing, and an eye for storytelling in unpredictable environments.
Whether you’re tracking deer at dawn or waiting hours for a glimpse of a rare owl, the wilderness doesn’t operate on your schedule, and of course, that’s half the fun. In this complete guide to wildlife photography, we’ll walk you through everything you need to know to get started (or level up): from choosing the right kit and settings, to fieldcraft and composition tips, to post-processing and ethical considerations.
Table of Contents
- What Is Wildlife Photography?
- Getting Started with Wildlife Photography
- Essential Gear Overview
- Basic Tips for Spotting and Tracking Wildlife
- First-Time Do’s and Don’ts
- Choosing the Right Gear
- Cameras: DSLR vs Mirrorless
- Lenses: Telephoto and Zoom
- Tripods, Gimbals, and Camera Traps
- Understanding Wildlife Photography Settings
- Shutter Speed
- ISO
- Aperture
- Autofocus Modes
- Burst Mode & Silent Shooting
- Techniques for the Field
- Camouflage and Patience
- Anticipating Animal Behaviour
- Using Light and Composition
- Ethics and Safety in the Wild
- Respecting Animals and Habitats
- Legal Considerations
- Human-Wildlife Conflict: What to Avoid
- Where and When to Shoot
- Best Times of Day & Season for Animal Activity
- Golden Hours (Sunrise & Sunset)
- Early Morning
- Dusk and Twilight
- Seasonal Patterns and Behaviour
- Best Times of Day & Season for Animal Activity
- Post-Processing Your Wildlife Shots
- Importing and Organising Images
- Enhancing Detail Without Overediting
- Removing Distractions and Background Noise
- Exploring Styles and Subjects
- Bird Photography
- Safari / Big Game Photography
- Underwater Wildlife Photography
- Nocturnal Wildlife Photography
- Macro: Insects & Small Mammals
- Animal Portraits
- Common Challenges (and How to Overcome Them)
- Motion Blur, Low Light & Distance
- Travel Logistics
- Animal Unpredictability
- Wildlife Photography Ideas and Inspiration
- Daily or Seasonal Photo Challenges
- Wildlife Photographers to Follow
- Ideas for Local Wildlife Projects
- Tips for Beginners
- Related Resources and Next Steps
What Is Wildlife Photography?
At its most basic, wildlife photography is all about capturing animals in their natural habitat, doing what they do without human interference. Whether it’s a grizzly bear fishing for salmon, a colony of puffins nesting on a cliff, or a dragonfly hovering mid-air, the aim is to document real, unscripted moments from the animal kingdom.
It’s easy to mix wildlife photography with nature or landscape photography, and there is quite a bit of crossover between them. Landscapes focus on terrain, light, and mood, and nature photography might include plants, fungi, or wide shots of ecosystems. However, wildlife photography zeroes in on living, breathing creatures. They are often wild animals, sometimes elusive, and almost always unpredictable.
People get into wildlife photography for all sorts of reasons. For some, it’s a personal passion or a way to unwind outdoors with a camera in hand. For others, it’s a serious pursuit where they support conservation efforts, contribute to scientific research, or get published in magazines, books, and exhibitions. No matter your angle, wildlife photography offers a unique blend of art, adventure, and purpose.
Getting Started with Wildlife Photography
Wildlife photography is all about patience, timing, and being ready when nature shows you something amazing. The best thing is that often you can begin in your own backyard, or local nature reserve, and there’s no need to visit far-flung places to take great photographs.
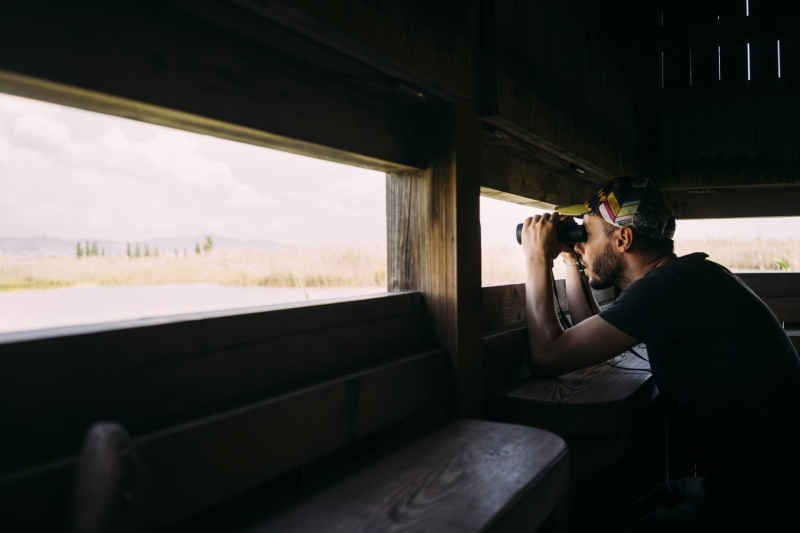
Wherever you’re headed, it helps to have the right gear, a basic understanding of animal behaviour, and a respectful approach to the wild. It’s not just about bagging the perfect shot either, the best wildlife photographers have a wealth of knowledge about the animals they are photographing and the environment they live in.
Essential Gear Overview
You don’t need the biggest lens in the world to get started, but certain tools will definitely make your life easier:
- Weather protection: For both you and your gear (think rain covers, waterproof bags, etc.).
- Camera with fast autofocus: DSLR or mirrorless, ideally with good burst mode.
- Telephoto lens: A 300 mm+ lens helps you keep your distance while getting close-up shots.
- Tripod or monopod: Useful for stability during long waits or heavy gear.
- Extra batteries & memory cards: Wildlife doesn’t wait for recharging or data offloading.
Basic Tips for Spotting and Tracking Wildlife
- Learn animal habits and routines: Time of day, feeding zones, and seasonal behaviour.
- Use your ears: Often, you’ll hear animals before you see them.
- Move slowly and stay quiet: Sudden movements or noise can send your subject running.
- Dress to blend in: Neutral colours and non-rustling fabrics help you stay unnoticed.
- Use natural cover: Trees, bushes, or even a portable blind can help you get closer.
First-Time Do’s and Don’ts
Do:
- Respect local wildlife laws and protected zones.
- Practice shooting birds or squirrels in your backyard to improve tracking and focusing.
- Bring snacks and water, it can be a long wait! Consider bringing or wearing mosquito repellent or resistant clothing.
- Be patient and persistent, great shots often take time.
Don’t:
- Approach or bait wildlife for a better shot, it makes wildlife accustomed to humans and increases potentially dangerous interactions.
- Leave trash or disturb habitats.
- Rely only on gear. Good fieldcraft matters just as much as your camera.
Starting small and learning to observe is the best way to grow your wildlife photography skills. You don’t need to fly off to the Serengeti; there’s probably plenty of wildlife waiting to be photographed right in your local area.
[Related Reading: Avoid these six wildlife photography mistakes everyone else makes]
Choosing the Right Gear
When it comes to wildlife photography, your gear can make the difference between a once-in-a-lifetime shot and a missed opportunity. The key is choosing equipment that fits your style, budget, and shooting environment. Here’s what to consider:
Cameras: DSLR vs Mirrorless
Both systems have their strengths, and the best choice depends on your needs:
- DSLRs
- Proven reliability and longer battery life
- Widely available used gear (good for tight budgets)
- Excellent optical viewfinders for bright conditions
- Mirrorless
- Lighter and quieter if you use the silent electronic shutter option. It’s ideal for sneaky fieldwork
- Advanced autofocus and subject tracking
- Real-time exposure previews via electronic viewfinder
- Faster burst modes
- better in low light with higher ISO
- In-camera anti-barrel distortion with the very wide-angle lenses
- Option to switch seamlessly between 4K+ video and stills
DIY Tip: If you’re on a budget, consider buying a used body and investing more in a good lens, it’ll often make a bigger difference to image quality.
[Related reading: Best cameras for wildlife photography]
Lenses: Telephoto and Zoom
In wildlife photography, your lens is even more important than the camera body:
- Telephoto prime lenses (e.g., 300mm, 400mm, 600mm, super tele 800 mm+):
- Superb image quality and faster apertures
- Great for professional work, but can be heavy and pricey, especially the ultra-long telephoto like the RF 1200mm, which comes in around $20,000!
- Zoom lenses (e.g., 100–400mm, 70–300mm, 150 mm – 600 mm):
- Versatile for changing distances and subjects, no need to lug multiple lenses
- More compact and budget-friendly
- Slightly less sharp than primes, but often good enough for most situations
- Can be extremely heavy, a monopod is a good idea
- Third-party lenses, such as Tamron and Sigma, offer equally great options, which are easier on the wallet
Tip: Look for image stabilisation, especially if you’re shooting handheld or in low light. You can also consider adding a 2x tele-extender to your lens, though bear in mind it will cut the maximum aperture a couple of stops.
Tripods, Gimbals, and Camera Traps
Keeping your shots steady and your hands free is a big deal when you’re in the field for hours.
- Tripods
- Essential for low-light or long-lens work
- Choose lightweight carbon fibre if you hike often
- If you’re shooting from a vehicle, a small beanbag over the windowsill can be a great way to stabilise. a camera
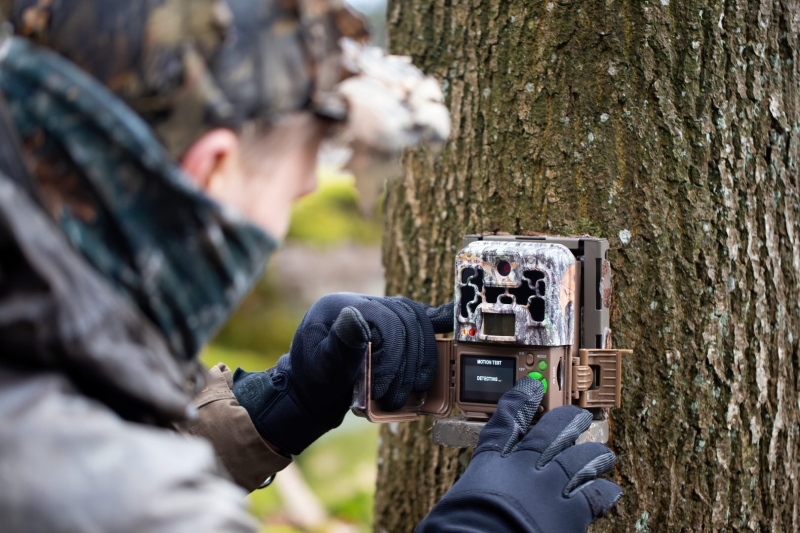
- Camera traps
- Great for capturing elusive nocturnal animals or leaving for a long time
- Make sure they are securely fastened to a tree
- Some brands can be connected via Bluetooth or wifi and monitored from your phone, no need to trek out to the camera every time you want to see what it’s captured
- Can be DIYed using motion sensors and weatherproof cases
Good gear doesn’t have to be expensive, but it does need to be reliable and suited to your shooting style. Invest where it counts, and don’t underestimate the power of secondhand deals or DIY solutions.
[Related Reading: Wildlife Photography with Basic Gear]
Understanding Wildlife Photography Settings
Wildlife sometimes moves fast and unpredictably, so knowing how to adjust your camera settings quickly is crucial. Of course, knowing how the exposure triangle works and having everything under your fingers is the ideal for getting great animal photos. But here’s are the core settings to get you started to consistently get sharp, well-exposed shots in the wild:
Shutter Speed
- Use fast shutter speeds (1/1000s or faster) to freeze movement, especially for birds in flight or running animals.
- For slower subjects or panning shots, you can go as low as 1/250s, but beware of motion blur.
- Start with shutter priority mode (Tv or S) if you’re new, and let the camera adjust the aperture for you.
ISO
- Keep ISO as low as possible to avoid noise, but don’t be afraid to raise it if light is low or you need a faster shutter.
- Modern cameras handle ISO 1600–3200 and even higher, surprisingly well.
- Use Auto ISO with a maximum cap for fast-changing conditions.
Aperture
- A wider aperture (f/4 or f/5.6) blurs the background and isolates your subject which is perfect for portraits of wildlife.
- Narrower apertures (f/8–f/11) increase depth of field, which is handy when you need more of the animal in focus like with large mammals or group shots, or if you want to show the animal in context with its environment.
- If you’re using a zoom lens, be mindful that your max aperture may change as you zoom in.
Autofocus Modes
Wildlife photography demands fast and accurate focus. Switch to:
- AI Servo (Canon) / AF-C (Nikon/Sony) for continuous tracking of moving subjects.
- Use single-point AF for precise control or zone AF when tracking unpredictable movement.
- Some mirrorless cameras offer eye-AF for animals, which is incredibly useful if supported. Canon certainly has this mode, and it works very well.
Burst Mode & Silent Shooting
- Burst mode (continuous shooting) helps you catch the perfect moment, especially for action, takeoffs, or quick behaviours. Some mirrorless cameras even have a mode that will take images a second or two before you press the shutter, ensuring that you don’t miss the important part of the action.
- Silent or electronic shutter is ideal for shy or easily startled animals, as there are no clicks to spook your subject. Just watch out for distortion when using silent mode with fast-moving subjects on some cameras.
Learning these settings and how they interact is key to nailing your shots in unpredictable environments. Practice on birds or squirrels in your area, and tweak settings on the fly to build confidence.
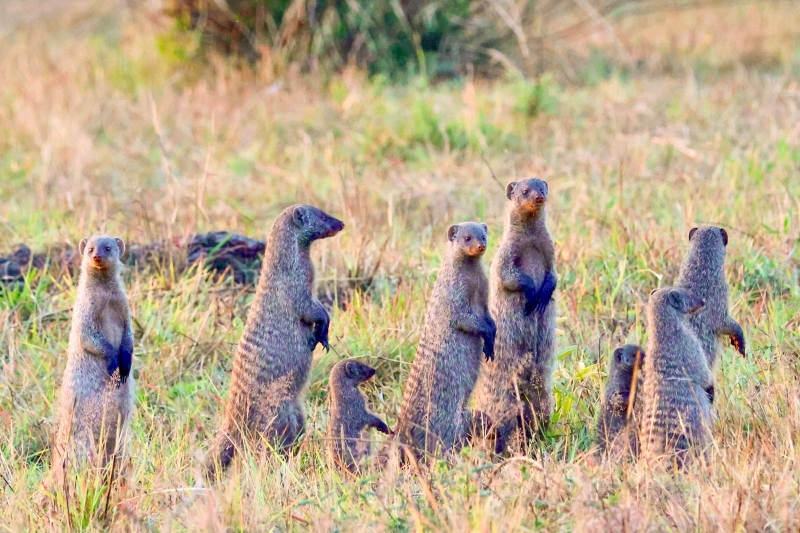
Mongoose at golden hour, Serengeti, Tanzania ©Abraham Folqué
[Related Reading: Best camera settings for wildlife photography]
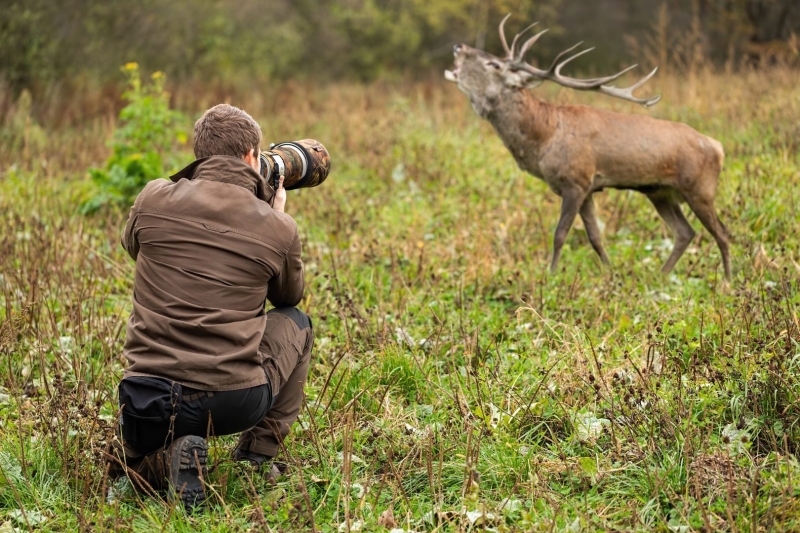
Techniques for the Field
Wildlife photography isn’t just about gear and settings, it’s also really important to know how to blend into the environment, read the behaviour of your subjects, and make the most of the conditions you’re given.
Above all, patience will be your biggest asset, alongside persistence and the ability to stay calm and upbeat in less-than-ideal situations. These field techniques are what separate decent wildlife photos from truly captivating ones:
Camouflage and Patience
- Dress in neutral, non-reflective colours that blend with your environment. Greens, browns, and greys usually work well and have the added advantage of being less attractive to mosquitoes.
- Stay still and quiet. Sudden movement or sounds will alert wildlife faster than you think.
- To conceal yourself, use natural cover like bushes, trees, or rocks. You can also build a simple DIY hide using camo netting or even an old bedsheet dyed to match your surroundings. You can also make use of existing bird or wildlife hides.
- Most importantly: be ready to wait. Great wildlife moments don’t follow a schedule.
Anticipating Animal Behaviour
- Study your subjects before you shoot. Learn feeding times, movement patterns, and seasonal behaviours.
- Watch for body language. Tail flicks, ear movements, or alert postures can signal that an animal is about to move, pounce, or flee.
- Set up near water sources, feeding grounds, or known trails to increase your chances of an encounter.
- The more you observe, the more you’ll develop a sixth sense for the shot before it happens.
- Consider hiring a local guide or wildlife expert who knows the terrain and ecosystem; it’s money well spent, especially if you’re in unfamiliar territory.
Using Light and Composition
- Shoot during golden hour (early morning or late afternoon) for soft, directional light and beautiful tones.
- Position yourself with the sun behind you or to the side for flattering light on your subject, avoid shooting directly into harsh midday sun.
- Apply composition techniques like:
- Rule of thirds to place the animal off-centre for visual balance.
- Framing using branches or natural surroundings.
- Negative space to give a sense of scale or isolation.
- Leading lines to guide the viewer’s eye toward your subject.
The real magic is being outside, watching these incredible moments unfold and witnessing the majesty of nature. The photographs should be secondary to that.
Ethics and Safety in the Wild
Good wildlife photography puts the subject first. If you have to choose between “getting the shot” and doing the right thing, choose the animal, every time. As a photographer, you have a role to play in protecting the animals, habitats, and ecosystems you’re capturing. Ethical practices preserve wildlife and help ensure your safety and the longevity of your access to wild places.
Be scrupulous in researching any tours or companies you sign up for too, especially in some parts of the world where local conservation efforts are suffering under the weight of over-tourism. Some very popular methods of attracting animals to appease tourists are actually quite detrimental to the well-being of the wildlife, and can promote concerning behaviour and desensitisation to humans.
Underwater photographer Amos Nachoum told us in his interview that great white sharks are usually baited to create the scary Jaws photographs. However, in real life and unbaited, left to behave naturally in peace, these giant animals are fairly docile and serene and certainly don’t deserve their fearsome reputation. It important to have this information so that the wildlife you photograph is portrayed in the correct context, one that can reinforce conservation efforts and not hinder them.

Hippos in the Mara River, Serengeti, Tanzania ©Abraham Folqué
[Related Reading: Is it ever ok to bait wildlife for photography?]
Respecting Animals and Habitats
- Always keep a safe distance. Use longer lenses instead of getting physically close.
- Avoid disturbing nesting areas, dens, or resting animals. If an animal changes its behaviour because of you, you’re too close.
- Don’t bait or feed wildlife, it disrupts natural behaviours and can make animals reliant on humans. Often with tragic consequences for the animal involved.
- Leave no trace: pack out everything, including trash, and avoid trampling vegetation or fragile environments.
- Don’t try to pet the ‘fluffy cows’. Many tourists have come undone by trying to pet bison in Yellowstone National Park. Similarly, a few Darwin awards are awarded each year when people try to take selfies with wild animals, expecting them to behave like their pet dog at home. Sometimes with terrible consequences. Don’t be a statistic.
This is definitely too close!
Legal Considerations
- Check local laws and regulations: some locations require permits for photography, especially in national parks or protected reserves.
- Be aware of protected species laws; disturbing or photographing endangered wildlife in certain ways can lead to hefty fines.
- Drones can be useful for scenic shots but are often banned near wildlife as they can stress or endanger animals, especially birds.
- Always fly responsibly and check airspace regulations before you launch. Drone fines, for example, in Spain can reach up to $250,000, that’s not something you want to risk.
Human-Wildlife Conflict: What to Avoid
- Never corner, chase, or provoke animals for a better shot.
- Avoid habituating animals to humans. This often ends badly for the animal, not the person.
- Travel in groups in predator areas (bears, big cats), carry safety gear (like bear spray), and be aware of the signs of stress or aggression. If on a safari, stay inside the vehicle and follow instructions from your guide.
- Don’t photograph wildlife in captivity without disclosure. It misrepresents the natural world and undermines ethical efforts.
[Related Reading: Wildlife photography ethics]
Where and When to Shoot
There’s really no ‘best place’ to find wildlife. There’s almost certainly plenty of wildlife activity in your backyard or local nature reserve. However, certain parts of the world are certainly renowned for their rich fauna and impressive backdrops.
Capturing compelling wildlife photos is often about being in the right place at the right time, and planning ahead. Knowing when animals are most active, where to find them, and how different environments impact your shots can help you maximize both success and adventure. One great example of dedication and planning is how wildlife photographer Liron Gertsman planned for a year to get the spectacular shot of a frigate bird with the full solar eclipse.
Best Times of Day & Season for Animal Activity
Knowing when to be in the field is just as important as knowing where to go. Wildlife activity follows natural rhythms shaped by light, temperature, and seasonal changes. Understanding these patterns can dramatically increase your chances of capturing animals at their most photogenic—or at their most fascinating.
Golden Hours (Sunrise & Sunset)
These are the holy grail of wildlife photography:
- Light quality is soft, warm, and directional which is ideal for adding mood and depth to your images without harsh shadows or overexposure.
- Many animals are most active during these cooler hours, especially in hot climates where midday movement is limited.
- Mornings often offer crisper air, mist, or dew that adds atmosphere to landscapes and backgrounds.
Tip: Arrive at least 30 minutes before sunrise or stay 30 minutes after sunset. Some of the best light happens just before and just after the sun appears, also known as the Blue Hour.
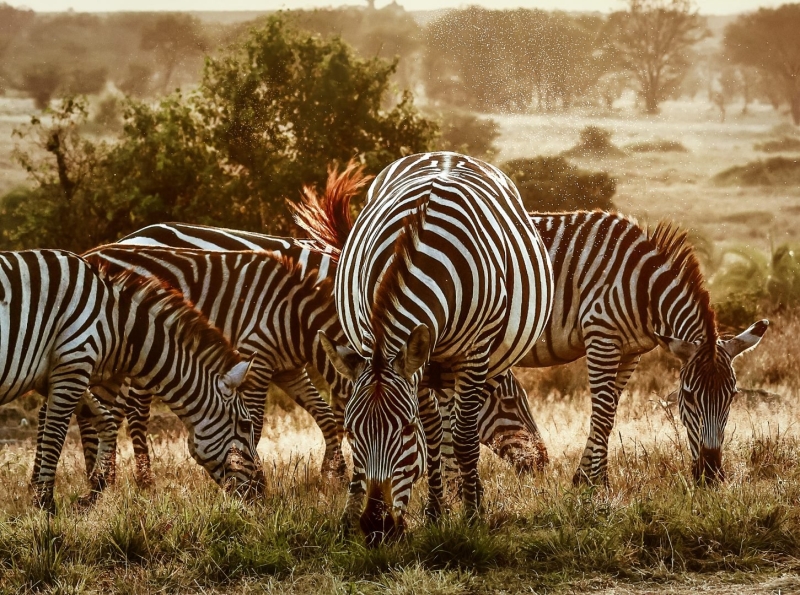
Zebras at golden hour, Serengeti, Tanzania ©Abraham Folqué
Early Morning
- Birds are incredibly active just after sunrise, calling, feeding, or defending territory. Seabirds will often return to cliffs to roost at dusk.
- Predators like lions, leopards, wolves, and foxes often return from nocturnal hunts and may still be out and visible before retreating to shade.
- You’ll also avoid tourist crowds, giving you more freedom to work quietly and patiently.
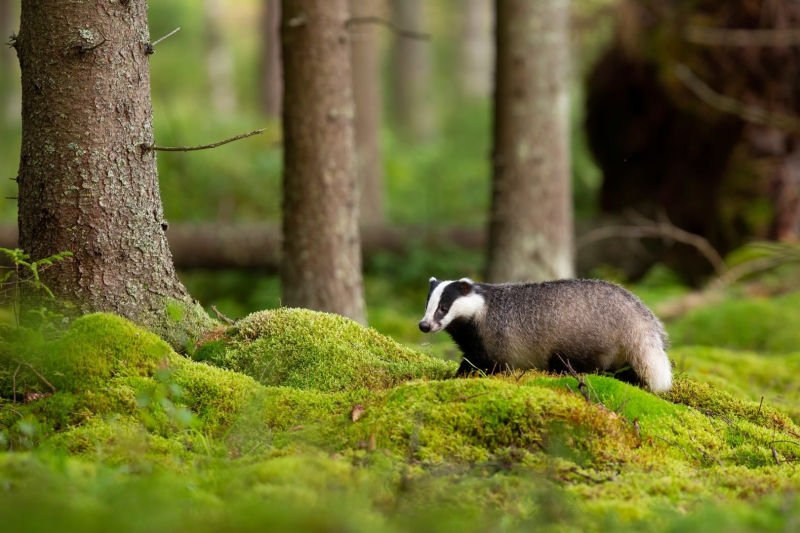
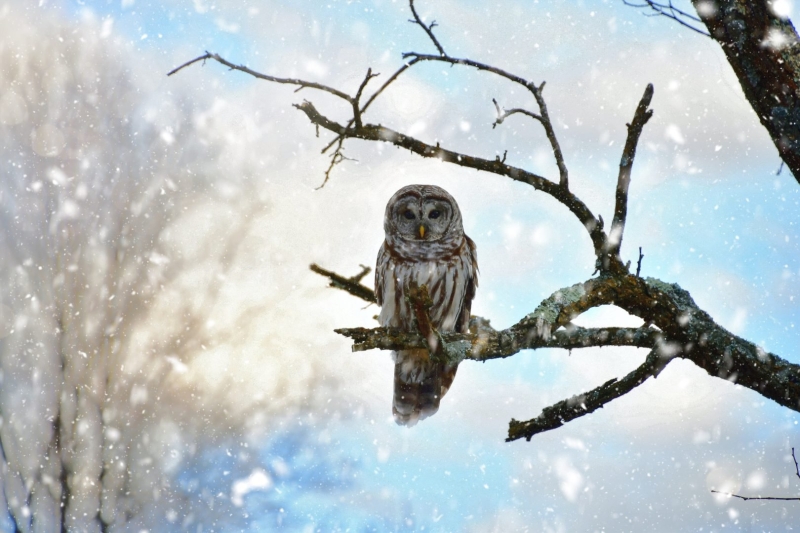
Dusk and Twilight
- Perfect for photographing nocturnal species like owls, badgers, foxes, or big cats starting to stir.
- Light drops quickly, so use faster lenses and higher ISOs, or plan for silhouettes and moody low-light compositions.
- Animals can be surprisingly bold at twilight, especially in less disturbed areas.
- If using camera traps, you can use infrared sensors and cameras to trigger captures during the night.
Seasonal Patterns and Behaviour
Seasonality plays a huge role in animal behaviour, and photography opportunities:
- Spring (Nesting, Birthing, Courtship)
- Birds are in vibrant breeding plumage and often display for mates.
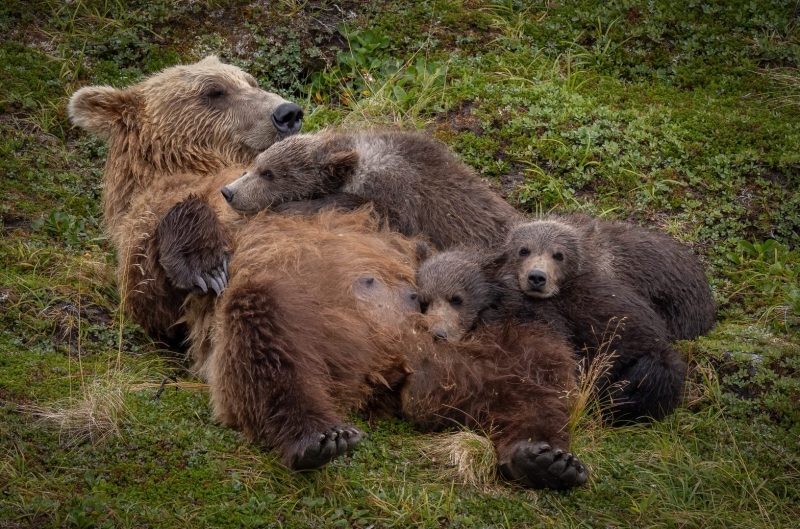
- Many mammals give birth, offering rare chances to photograph young animals in natural interactions. Be careful not to unwittingly get between a mother and her young. Bears, particularly, can be unpredictable during cub season.
- Territorial behaviour makes animals more visible and vocal.
- Summer (Feeding, Growth, Activity Peaks)
- Long days mean extended shooting hours, but also harsher midday light, so stick to mornings and evenings.
- Young animals are growing and more active.
- Waterholes and shade areas become high-traffic zones in hotter regions.
- Autumn (Migration, Preparation for Winter)
- Migratory birds gather in massive flocks, ideal for dramatic sky compositions or storytelling shots.
- Many animals forage heavily, making them easier to locate.
- Forests and grasslands turn colourful, offering visually rich environments.
- Winter (Minimal Foliage, Unique Lighting)
- Bare trees and snow make animals easier to track and spot.
- Snow adds contrast and mood, especially useful for high-key or minimalist compositions.
- Activity may drop in colder regions, but hardier species like elk, wolves, and arctic foxes remain active.
- Tip: In snow or cold conditions, bring extra batteries and protect gear with neoprene covers or plastic bags to avoid condensation.
[Related Reading: Beginner tips for capturing wildlife in their natural habitat]
Post-Processing Your Wildlife Shots
Editing wildlife images is about finding that sweet spot: enhancing what’s already there without losing the raw, natural feel of the moment. Good post-processing brings out detail, controls distractions, and helps your subject shine, without making it look like it was created with AI.
Talking of AI, there have been a few incidents of people making composites of rare wildlife like snow leopards and passing it off as real. Obviously, this is unethical and only does damage to real conservation efforts. Whether you’re using Lightroom, Photoshop, or free tools, the goal is to polish, not reinvent.
Importing and Organising Images
Before you touch a single slider, set yourself up for success with a clean workflow:
- Use a consistent folder and naming structure (e.g., Location_Date_Species) to quickly find shots later.
- Keyword your images by species, location, or behaviour for easier searching, especially useful as your catalogue grows.
- Use flagging, rating, or colour-coding to narrow down your best images before editing begins.
- If you shoot in RAW (recommended), make sure your software is set up to handle the colour profile properly.
Enhancing Detail Without Overediting
- Start with exposure and contrast adjustments to bring balance and depth to the image.
- Use the clarity and texture sliders sparingly to bring out feather or fur detail without making it look crunchy.
- Adjust shadows and highlights to recover lost detail, especially in high-contrast lighting.
- Be mindful of colour accuracy, don’t oversaturate. Let natural tones do the talking.
- Use local adjustments (like radial filters or brushes) to subtly brighten your subject or darken the background to guide the viewer’s eye.
Removing Distractions and Background Noise
The choice to remove distractions is both an ethical and artistic consideration. Think about whether your image is intended to be fine art or more photojournalistic. If the latter, then removing items is less acceptable. If your image is for the wall or your own personal use then removing distracting elements can help the overall look of an image.
- Use healing tools or clone stamp to remove small distractions like twigs, bright spots, or sensor dust.
- Apply selective noise reduction to backgrounds while preserving sharpness on the subject.
- Crop carefully to improve composition or remove dead space, but avoid cropping too tightly; you may want room for printing or social aspect ratios later.
- In Photoshop, try content-aware fill to clean up background elements without rebuilding the scene manually.
Exploring Styles and Subjects
Wildlife photography covers a vast range of styles and niches, and each one has its own things to take into account. It can vary wildly (pun intended!) between what kind of gear you need, whether you need any additional training and safety equipment, and even just the overall approach. Here are a few of the most popular niches in wildlife photography:
Bird Photography
If you’ve ever tried tracking a kingfisher mid-dive or freezing a hummingbird’s wings at 1/4000 sec, you’ll know bird photography can be technically demanding.
- Best gear: a 300mm or 500mm lens (with fast autofocus), or even a crop-sensor camera to gain reach.
- Position yourself near feeders, waterholes, or flowering trees, anywhere birds predictably return.
- For flight shots, set your shutter to 1/2000 sec or faster, continuous AF-C, and burst mode.
- Try photographing in foggy conditions for a minimalist mood, or during rain for dramatic, textured frames.
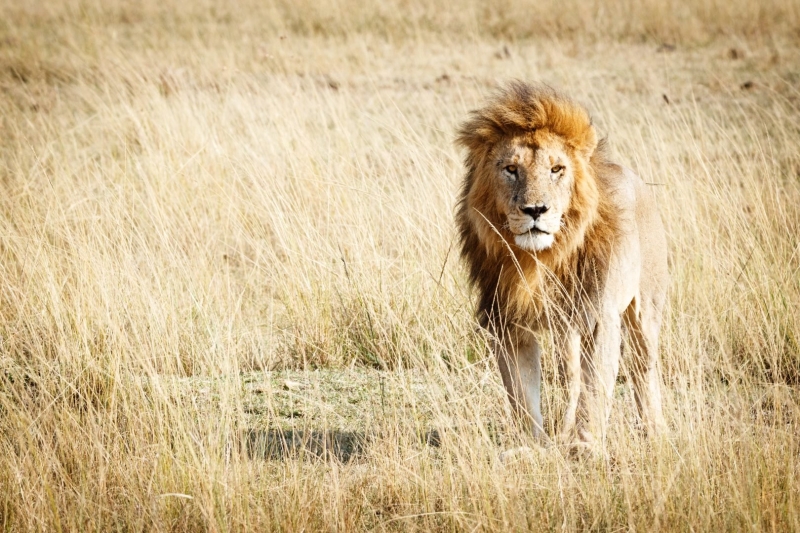
Safari / Big Game Photography
Safari photography isn’t all about big lenses and Land Cruisers. Great images come from understanding behaviour and reacting fast when it counts.
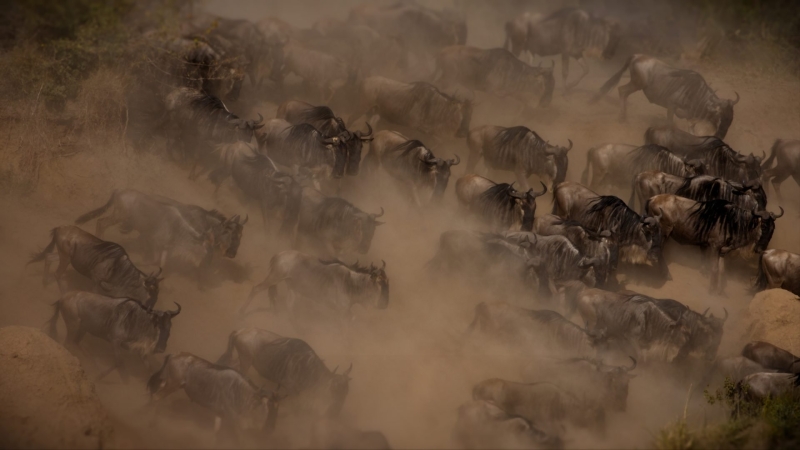
- In East Africa (Masai Mara or Serengeti), you’ll often shoot from open-top 4x4s, so prepare for dust, heat haze, and vehicle shake.
- Get low angles when possible. Some parks (like South Africa’s Sabi Sands) allow off-road access with private guides.
- Don’t just shoot the animal, shoot the environment, the dust, the light, and interactions (lion cubs playing, elephants dust bathing).
- Patience pays: A cheetah scanning the horizon is a better shot than one just walking away.
- Drones aren’t typically allowed, so to get that bird’s eye view, consider taking a hot air balloon safari for an unusual perspective and an unforgettable experience.
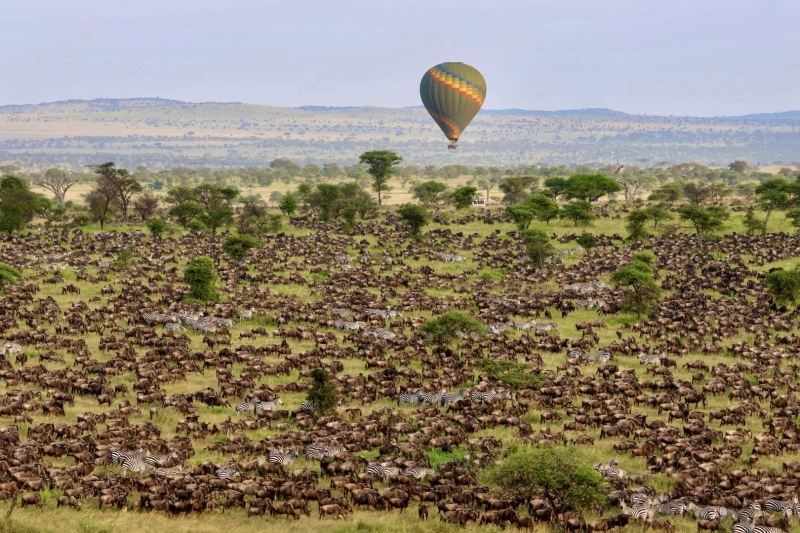
Safari balloon flights over the Serengeti ©Abraham Folqué (Adventures Aloft LTD Tanzania)
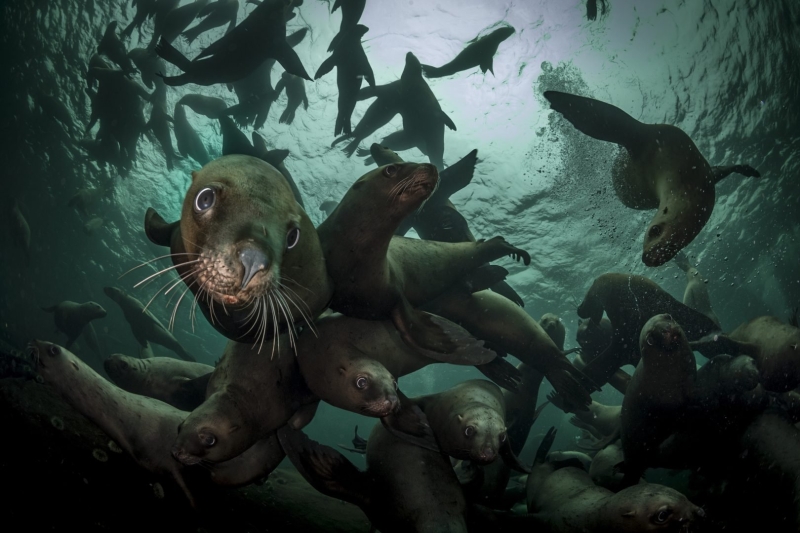
Underwater Wildlife Photography
Shooting underwater opens up a surreal world of marine life, vibrant colour, and unique motion. However, it requires proper preparation and a healthy respect for the ocean. You don’t need to start with sharks or deep dives, coastal shallows and reefs are ideal places to begin.
- Start with accessible locations like:
- Florida Keys (USA): great for snorkelling with tropical fish, manatees, and sea turtles.
- Cornwall (UK): known for seals, and sea anemones in shallow bays.
- Mediterranean beaches (e.g., Spain or Greece): clear waters with octopus and other coastal marine life.
- Southern California tide pools: great for photographing crabs, sea stars, and juvenile fish.
- A wide-angle lens is essential. Longer lenses simply don’t work due to reduced visibility. You have to get close to your subject.
- Use strobes or video lights to restore colour and contrast lost in deeper water.
- Buoyancy control is crucial. Not just for image sharpness, but to avoid damaging fragile coral and staying safe.
- Keep your shutter speed at 1/250 or faster to freeze motion in surge or current.
- Even snorkelling can yield great shots. Look for subjects like sea turtles, reef sharks, or schooling fish.
- Learn how to post-process and colour grade underwater images to reduce the green/blue tones.
Safety Note: Always dive within your training limits. If you’re using scuba gear, complete a certified diving course (e.g., PADI or SSI) before bringing a camera underwater. Never dive alone, and be aware of currents, marine life behaviour, and boat traffic.
Nocturnal Wildlife Photography
Photographing nocturnal animals is all about subtlety, patience, and being prepared to shoot in total darkness. Many elusive species only appear after dusk, and capturing them without disturbing their behaviour is part of the challenge.
- Use a 70–200mm or 300mm lens for a safe working distance.
- Equip your setup with a red LED headlamp or flashlight; animals don’t perceive red light as easily.
- Manual focus or spot AF is often more reliable in low light.
- Flash should be used sparingly and responsibly. Set it to low power, avoid repeated bursts, and always be mindful of animal welfare.
- Some places offer guided night walks where you can practice ethically.
DIY setup: A budget trail cam with infrared sensors can help you learn about local nocturnal activity and plan manual photo sessions later.
[Related Reading: High-Quality Camera Trap Photos Reveal the Unseen Rainforest Wildlife]
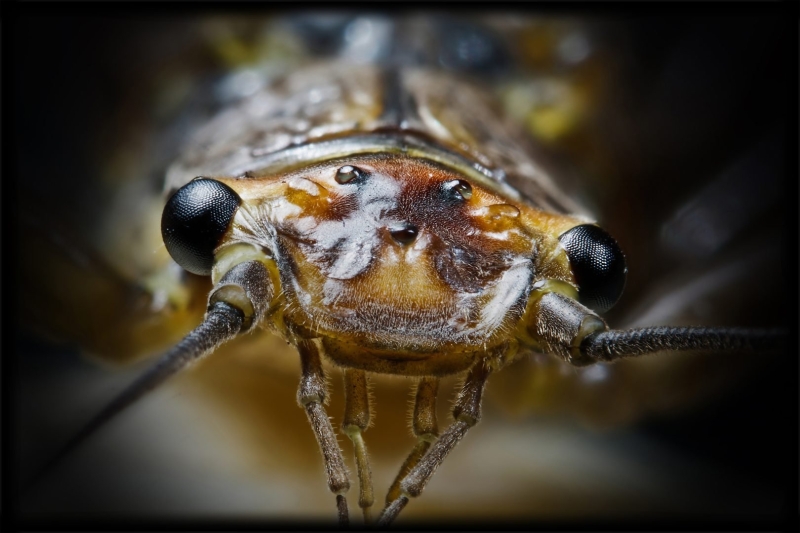
Macro: Insects & Small Mammals
You don’t need a national park for macro photography, just a good eye and the right approach. And a lack of fear of bugs!
- Ideal for urban wildlife photography: bees, beetles, frogs, even mice in your garden or a park.
- Use a dedicated macro lens (like 100mm f/2.8) and a soft diffused flash for best results.
- Early morning is best, as many insects are cold and sluggish, making close-ups easier.
- Watch for symmetry, reflections (on dew or water), and clean compositions.
Animal Portraits
Great wildlife portraits isolate the subject emotionally, just like human portraits.
- Use wide apertures (f/2.8–f/5.6) to get creamy bokeh and isolate the animal from the environment.
- Focus manually or with eye-tracking AF, especially with static subjects like owls or resting cats.
- Clean backgrounds matter: photograph against distant foliage or sky for minimal distraction.
- Pay attention to eye contact, symmetry, or profile angles for striking composition.

Common Challenges (and How to Overcome Them)
Wildlife photography is equal parts patience, planning, and improvisation. While it’s incredibly rewarding, it also comes with its fair share of obstacles. Here are the most common ones and how to overcome them:
Motion Blur, Low Light & Distance
Wild animals don’t sit still, and they certainly don’t wait for perfect lighting. Combine that with long distances, and fleeting glimpses, and you’ve got a real technical challenge.
- Motion blur: Use faster shutter speeds (1/1000 sec or faster) for moving subjects. Crank up ISO if needed, grain is easier to fix in editing than blur and modern mirrorless cameras don’t have nearly so much noise as older DSLRs.
- Low light: Shoot during golden hour or in open areas. Choose lenses with wide apertures (like f/2.8 or f/4), and again, don’t be afraid to push your ISO.
- Distance: Use telephoto lenses (300mm+), or try crop sensor cameras for extra reach. If you’re stuck with a shorter lens, focus on closer or more approachable species like birds at feeders or animals in parks.
DIY Tip: A cheap beanbag on your car window works as a super-stable support for long lenses, ideal for safari or roadside shooting.
Travel Logistics
Getting to wildlife hotspots can be costly, time-consuming, and often unpredictable.
- Research seasons and migration patterns in advance. Going at the wrong time could mean empty landscapes.
- Pack light but smart: Bring spare batteries, memory cards, and rain covers, essentials that are hard to find on location.
- Join local groups or hire community guides. They often know where to find wildlife far better than online maps or apps.
- Always check regulations, especially regarding drones, protected areas, and photography permits.
Animal Unpredictability
Even with all the planning in the world, animals may simply not show up, or they might bolt the moment you lift your camera. Just remember how patient the wildlife documentary filmmakers have to be to capture those epic shots of rare animals, and it puts everything into perspective.
- Learn animal behaviour and signs: alarm calls, tracks, or fresh scat can indicate nearby activity.
- Stay patient. Sometimes the best shot happens after hours of quiet waiting.
- Minimise movement and stay downwind when possible. Blend into the environment with natural clothing or even a simple DIY camo wrap for your gear.
- Accept the misses. Wildlife photography is a long game, and your best images often come after lots of near-misses and learning moments.
Mindset reminder: If nothing shows up, focus on landscapes, textures, or storytelling shots of your setup. These still build your portfolio and sharpen your eye.

Wildlife Photography Ideas and Inspiration
Wildlife photography thrives on creativity, persistence, and curiosity, no matter where we are. Here are some ideas to help you stay inspired, challenge yourself, and grow your skills, even when the exotic stuff isn’t in reach.
Daily or Seasonal Photo Challenges
Stuck in a rut? A photo challenge can push you to explore new angles, light, or subjects, plus it builds discipline.
- 30-Day Wildlife Challenge: Aim to photograph a different animal, bird, or insect each day, even if it’s just in your neighbourhood.
- Seasonal Themes: Focus on nesting in spring, migration in autumn, or tracking prints in the snow during winter.
- One Subject, Many Shots: Try capturing the same species in different weather, times of day, or behaviours across several weeks.
DIY Tip: Print your own challenge cards or build a small “shot list deck” to randomise themes like ‘backlight a bird’ or ‘capture a grooming moment.’
[Related Reading: Wildlife photography composition tips]
Wildlife Photographers to Follow
Learning from the pros is one of the fastest ways to grow. These photographers combine artistry, fieldcraft, and often conservation work:
- Frans Lanting: Known for intimate, painterly portraits of animals and ecosystems.
- Beverly & Dereck Joubert: Renowned for their big cat work and powerful storytelling from Africa.
- Paul Nicklen: Polar specialist and Nat Geo photographer; a master of underwater and ice wildlife imagery.
- Amos Nachoum: Underwater photographer who is redefining our perception the scariest predators
- David Lloyd: Award winning photographer who specialises in working in Africa and India
- Tim Laman – Bird-of-paradise expert with incredible rainforest access and patience.
- Melissa Groo – Advocates for ethical bird photography and conservation, with stunning minimalist compositions.
- Ami Vitale: Nat geo photographer and conservationist
Follow their social accounts, blogs, or YouTube channels for behind-the-scenes tips, gear breakdowns, and project inspiration.
[Related Reading: Get Inspired by the 2024 Wildlife Photographer of the Year]
Ideas for Local Wildlife Projects
You don’t need a plane ticket to build a compelling wildlife portfolio. Focus on species around you, especially ones that others overlook.
- Urban Wildlife: Think foxes, pigeons, raccoons, or coyotes navigating city spaces.
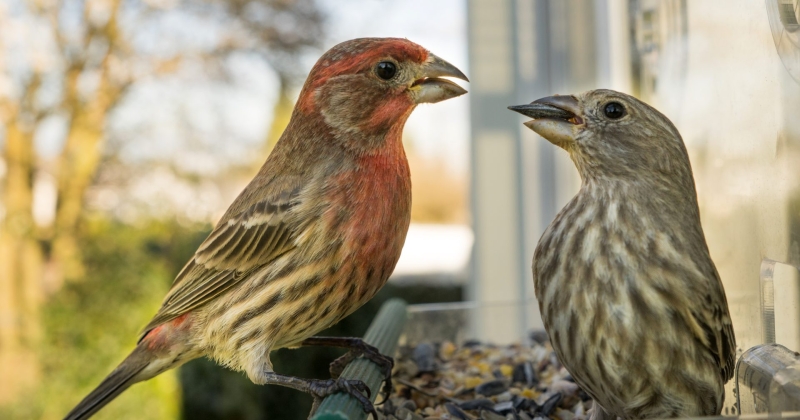
- Garden Safari: Document insects, birds, or even squirrels and frogs in your backyard.
- Nightlife Project: Use a basic trail cam to record nocturnal activity and build a photo series around it.
- Feeding Station Series: Set up a feeder or perch and photograph the different species that visit over time. It’s great for learning light and timing.
Tips for Beginners
Starting out in wildlife photography can feel overwhelming, but it’s important to remember that even the pros began with blurry birds and missed moments. The key is to enjoy the process and keep showing up with your camera. Here are a few parting tips to guide your journey:
- Be patient, not perfect
Wildlife doesn’t perform on cue. Give yourself the space to wait, observe, and let moments unfold naturally. A single great frame after hours in the field is still a win. - Learn from your environment
Pay attention to animal behaviour, seasonal changes, and local habitats. Knowing when and where to shoot often matters more than having the most expensive gear. - Keep shooting and studying
Practice regularly, even if it’s just in your backyard. Review your photos critically, follow skilled photographers, and study the light, composition, and story behind strong images.
DIY Tip: Start a wildlife photo journal. Track sightings, conditions, camera settings, and what worked (or didn’t). It’s like your personal field guide for progress.
Related Resources and Next Steps
Looking to take your wildlife photography to the next level? Explore our top gear picks and Lightroom tutorials!
https://www.diyphotography.net/follow-these-ten-tips-to-instantly-improve-your-wildlife-photography/
https://www.diyphotography.net/master-wildlife-photography-with-these-essential-beginner-tips/
https://www.diyphotography.net/five-tips-for-wildlife-photography-without-a-super-telephoto-lens/
https://www.diyphotography.net/these-are-some-hidden-truths-about-wildlife-photography-on-instagram/