
Contents

Astrophotography is more than just taking pictures of stars. It’s about capturing the unseen beauty of the universe. It offers photographers the unique chance to record time, movement, and light in ways daytime photography cannot. The ever-changing night sky—filled with stars, planets, nebulae, and galaxies—is like an open canvas. Photographers find joy in the challenge of working in low light, planning their shots precisely, and revealing celestial objects invisible to the naked eye. This guide covers everything you need to start and grow in astrophotography. You’ll learn about the gear you need, the techniques to master, and the steps to plan, shoot, and edit your images. Whether you want to capture a bright full moon or dive deep into nebulae and galaxies, this guide walks you through each stage. Expect tips for all levels, from beginners to those looking to refine their skills.
What Is Astrophotography?
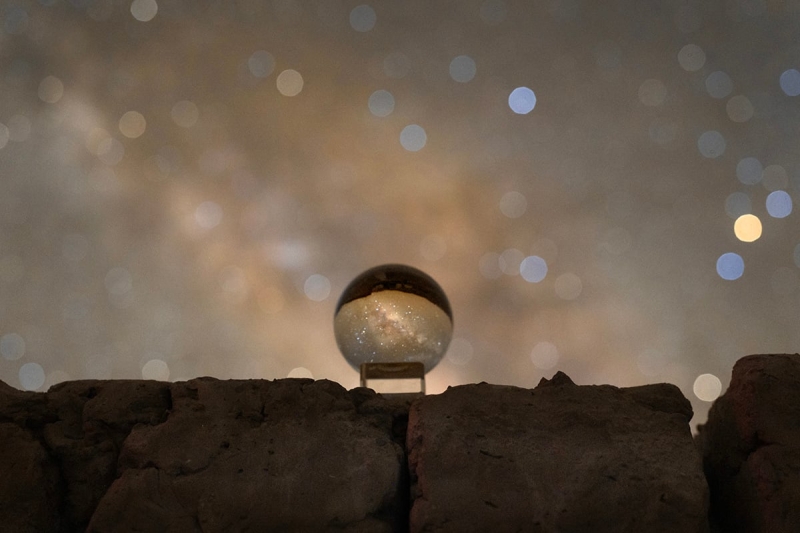
Astrophotography combines science, creativity, and patience. It’s a quiet, often solitary hobby that rewards patience, practice, and persistence. And when you finally capture that perfect image of the Milky Way rising over a mountain or Saturn’s rings through a telescope, it feels like holding a piece of the cosmos in your hands.
Quick definition
Astrophotography is the practice of photographing celestial objects and the night sky. It involves capturing the Moon, stars, planets, the Milky Way, and deep-sky objects like galaxies and nebulae. It also includes events like eclipses, meteor showers, and auroras. Some forms are artistic, while others are scientific.
Brief history and modern evolution
Astrophotography began in the early 1800s. The first known astronomical photo was of the Moon, taken in 1840. Over time, glass plates evolved into film and digital sensors. Professional observatories pioneered deep-sky photography using large telescopes.
In recent decades, digital technology has made it accessible to amateurs. DSLRs, mirrorless cameras, star trackers, and image stacking software have revolutionized the field. Today, even with entry-level gear, hobbyists can produce magazine-worthy images.
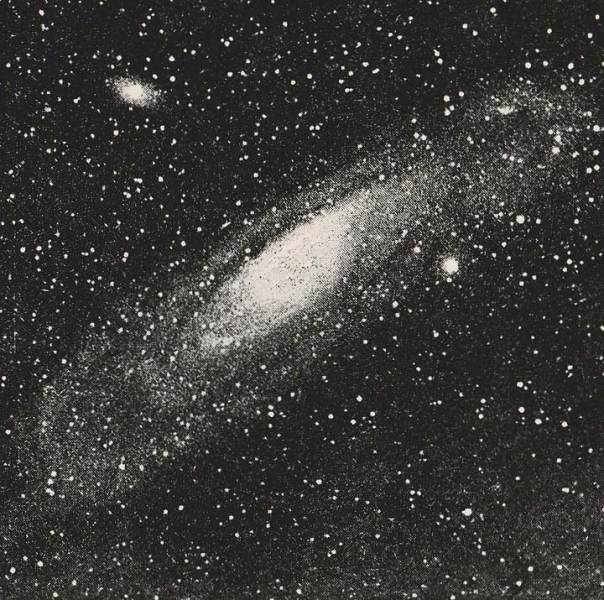
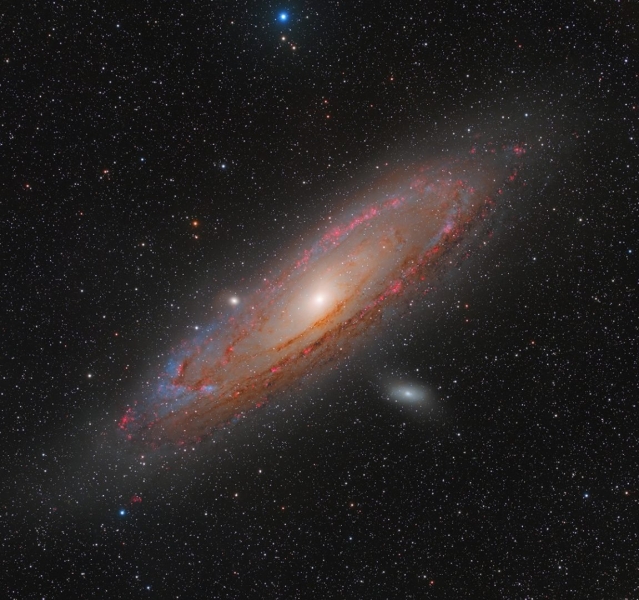
An image of the Andromeda galaxy captured in the 19th century
Types of astrophotography
- Nightscape: Captures the night sky with landscapes
- Deepscape: An advanced version of nightscapes with a higher focal length
- Lunar and Solar photography: Close-ups of the Sun and Moon’s surface
- Planetary imaging: Zoomed views of planets like Jupiter, Saturn, etc.
- Deep-sky imaging: Photos of galaxies, nebulae, and star clusters
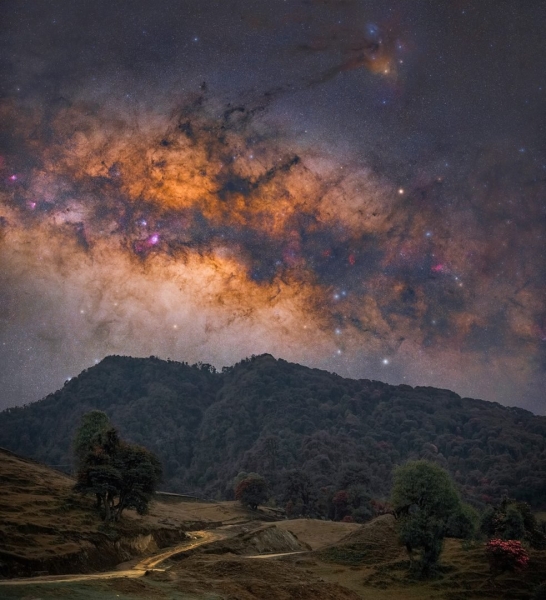
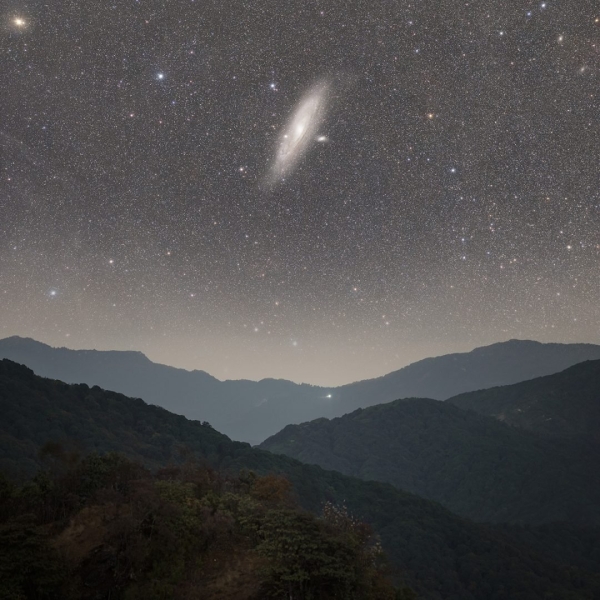
Nightscapes are considered to be one of the most popular types of astrophotography
[Related reading: Wanna start astrophotography? Start small and learn the basics with this helpful video]
Getting Started with the Right Gear
Although gear is not the most important thing in astrophotography, it is an essential one.
Basic gear checklist
- Camera: DSLR or mirrorless with manual mode
- Tripod: Sturdy and stable to avoid shaking
- Lens: Wide-angle (14mm to 35mm) or telephoto (135 mm+)
- Intervalometer: For long exposures or time-lapses
- Headlamp: With red light mode to preserve night vision
- Spare batteries and memory cards: Cold nights drain power fast
Here is another short checklist of equipment that may not be required at the beginning, but is useful for those who want to pursue astrophotography seriously:
- Star tracker: Helps follow stars and allows longer exposures
- Telescope: For planetary and deep-sky photography
- Dew heaters: Prevent lens fogging in humid areas
- Filters: Light pollution filters to get more contrast in the image
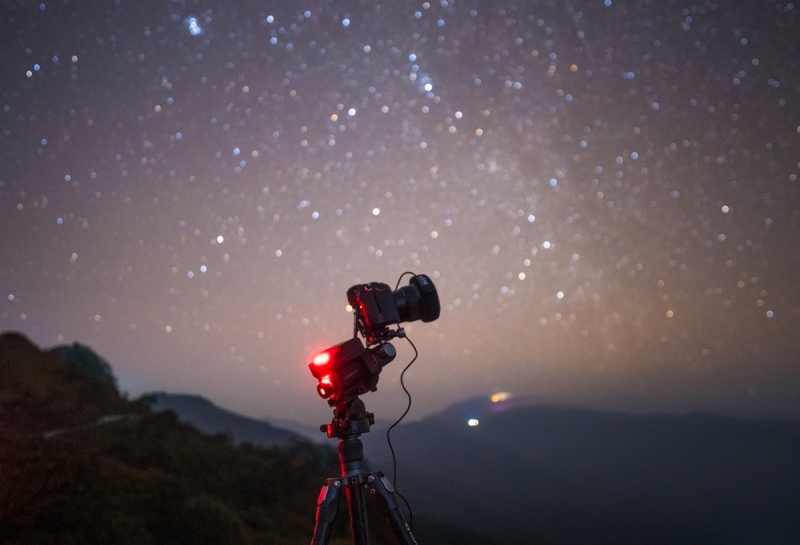
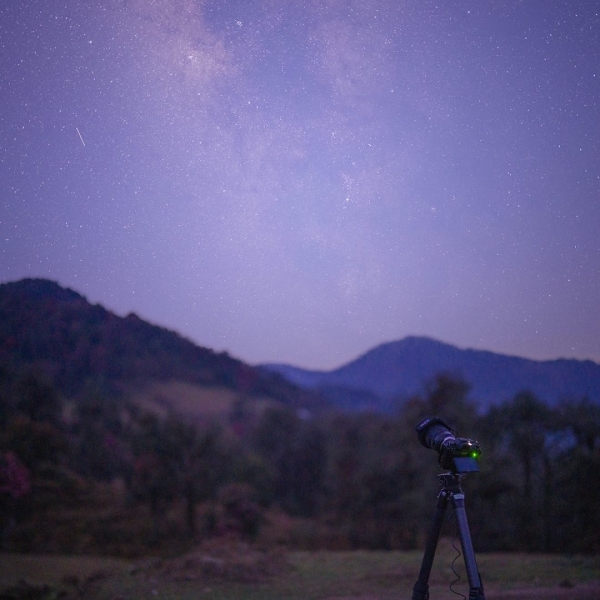
Star trackers are not mandatory, but they take your images to the next level
Entry-level vs. advanced setups
You can begin your astrophotography journey with any gear that you already own, even with your smartphone. It is important to remember not to invest in a lot of equipment right at the beginning. Once you develop your skills and taste in astrophotography, you can start buying advanced equipment to take your images to the next level.
| Entry-level | Advanced |
| Camera with a kit lens or a prime lens | Full-frame or astro-modified camera |
| Basic tripod | Star tracker or equatorial mount |
| Light-pollution filter (optional) | Dedicated astro camera with filters |
| Telephoto lens | Telescope |
Telescopes vs. telephoto lenses
Telephoto lenses and telescopes both offer a better reach to those celestial objects. A focal length of 200mm or above is suited for many subjects in astrophotography. While you might already own a telephoto lens (if you are into other genres of photography, e.g., wildlife or bird photography), a telescope is something that is used only for astrophotography.
- Telephoto lenses are easier to use, lighter, and quicker to set up. They work well for the Moon, Sun, and even some deep-sky subjects.
- Telescopes offer better results. They are essential for photographing planets and galaxies. But they require tracking, calibration, and a steeper learning curve.
- Telescope optics are made specifically for astrophotography. They perform better on stars.
Telephoto lenses take you closer to the celestial objects
[Related reading: The best camera gear for Milky Way Photography 2024]
Planning Your Shoot
Even before you go out to a dark sky to capture the stunning night sky, the planning needs to be taken care of. It is the first and one of the most important parts of doing astrophotography.
Weather, moon phases, and light pollution
- Clear skies are essential. Check forecasts and avoid clouds.
- Moonlight can wash out faint stars, so aim for new moon nights.
- You can use light pollution maps like DarkSiteFinder to find dark locations. Bortle scale ratings help determine sky quality.
Tools for planning
Here are some apps and websites that you can check before you head out to the field:
- Stellarium: Shows planet positions, constellations, and deep-sky targets.
- PhotoPills: Helps plan Milky Way alignment, moonrise/set times, and sun positions.
- Clear Outside: Accurate cloud and visibility forecasts.
These tools save time and improve success.
Safety and preparation tips
Safety comes first. While you might be excited to get your “dream shot”, you need to be careful about yourself and your equipment. Here are some tips you should be aware of:
- Scout locations in daylight
- Dress in layers; temperatures drop quickly
- Bring snacks, water, and first aid
- Avoid wildlife zones or private land
- Inform someone of your location
Bortle 1 skies give you the best astrophotography experience
[Related reading: This photographer spent a year planning this epic bird eclipse photo]
Camera Settings and Techniques
Once you reach the field, getting to know your camera and the ideal settings is the key to getting a good and sharp image. Camera’s “Auto” mode, unfortunately, doesn’t work at night for astrophotography. One of the first things that you are required to do is to set your camera to the “Manual” mode.
Manual mode and essential settings
Here are some of the settings you should be using on the field:
- Aperture: f/2.8 or the widest available
- Shutter speed: Use the 500 rule (500 / focal length = max seconds) to avoid star trails. If you are using a tracker, however, there are no such limits.
- ISO: 1600 to 3200 (or higher with newer cameras)
Use manual mode to get the complete control of your camera
Focusing in the dark
As mentioned earlier, your camera’s auto-focusing mode would not work for astrophotography. Here is how you can get the perfect focus in manual mode:
- Set your camera to live-view mode
- Increase your ISO to make the stars visible
- Choose a bright star or planet in the sky and bring it towards the middle of your screen
- Start at infinite focus and refine the focus until the star/planet appears the smallest
- Take a test shot to check the focus
- Remember not to touch the focus ring
You can also use focusing aids like Bahtinov masks for precise focusing with telescopes and telephoto lenses.
Using apps or calculators for exposure
Apps and websites like NPF Rule Calculators and Exposure calculator can help you choose the perfect settings for your camera.
NPF Rule Calculator: It is similar to the 500 rule, but an advanced version.
((35 x N) + (30 x P))/F = Exposure Time (in seconds)
While you can do the math manually, many websites will do it for you. This calculation would help you find the most suited shutter speed to get a sharp image and avoid star trails.
Exposure Calculator: While finding your composition and ideal camera settings, you are required to take multiple test shots. The test shots need not be long exposures, to save you some time. Generally, test shots are taken with comparatively shorter exposures (3-5 seconds) with high ISO. Once you are happy with the exposure and histogram, you can recalculate the settings for a longer exposure.
Many exposure calculator apps would help you do just that.
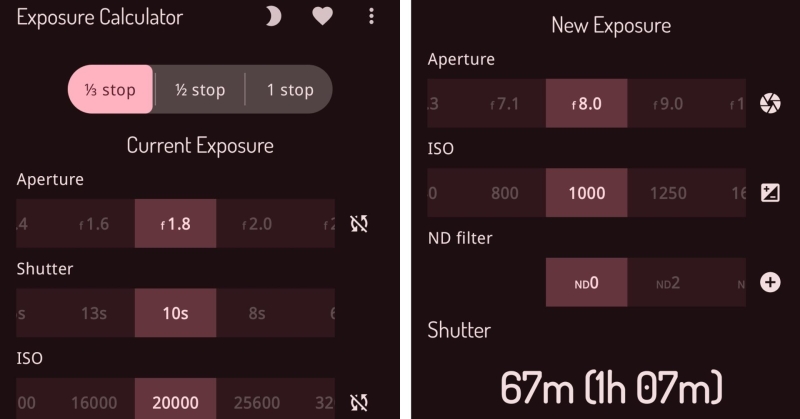
The Exposure Calculator app
[Related reading: How I created these images: Favourites of 2024]
Top Astrophotography Subjects
One of the best things about astrophotography is that there is an option for everyone, whether you are just starting out, you have gained some experience with photographing the night sky, or are a seasoned astrophotographer. There would also be a perfect subject for any gear you own; every focal length of lenses and telescopes would have an ideal subject match in the night sky.
Easiest to hardest subjects
Below, we list some of the subjects, going from easy to an advanced level.
Easiest:
- Constellations
- Wide-field Milky Way shots
- Star trails
- The Moon
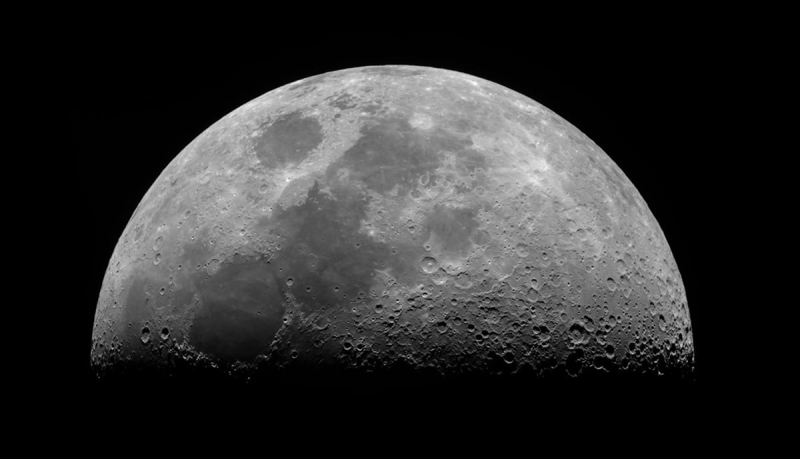
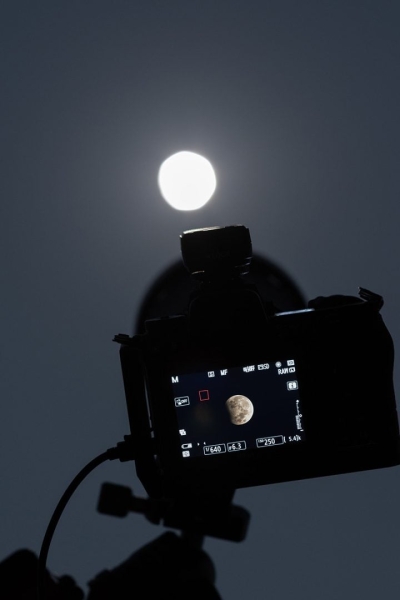
Begin your astrophotography journey with the moon
Moderate:
- Meteor showers
- Milky Way panorama
- The Sun
Advanced:
- Deepscapes
- Hi-resolution planets
- Nebulae and galaxies
- Comets and eclipses
A deepscape image combines deep sky objects with landscape elements
What to shoot by season
The night sky is dynamic. The subjects keep changing, allowing you to capture multiple celestial objects throughout the year.
- Spring: Leo Triplet, Virgo galaxies
- Summer: Milky Way core, Lagoon Nebula
- Autumn: Andromeda Galaxy, Triangulum Galaxy, Cygnus Arm
- Winter: Orion Arm, Orion Nebula, Pleiades, Rosette Nebula
- Throughout the Year: Sun, Moon, Star Trails
Each season brings unique subjects, helping you create a broader range of images.
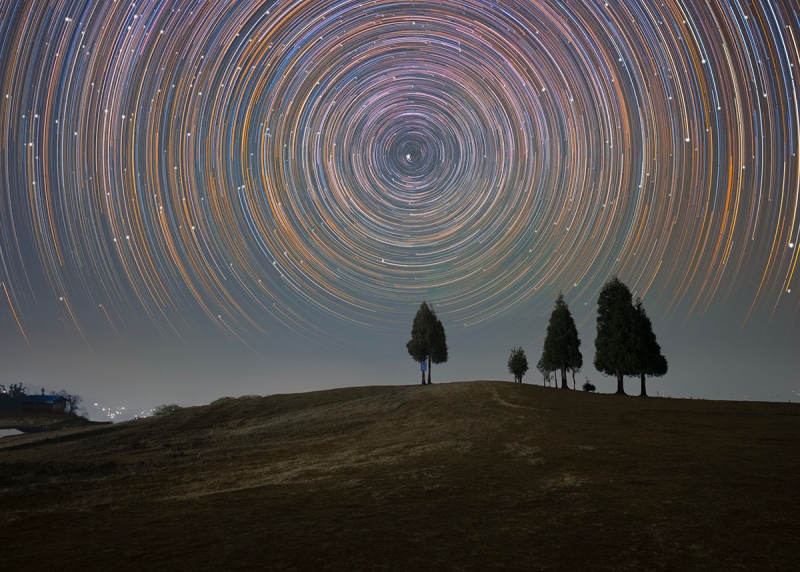
You can photograph star trails throughout the year
[Related reading: Here are the 3 Easiest Astrophotography Targets to get you started]
Shooting the Night Sky
Once you are on the field along with your companion camera, comes the second part of astrophotography: photographing the night sky.
Composing your frame
Framing is key, especially in nightscapes. To make a beautiful composition, you can include foreground subjects like:
- Trees
- Mountains
- Buildings
- Water body
Try both portrait and landscape orientations and see what suits best for the composition.
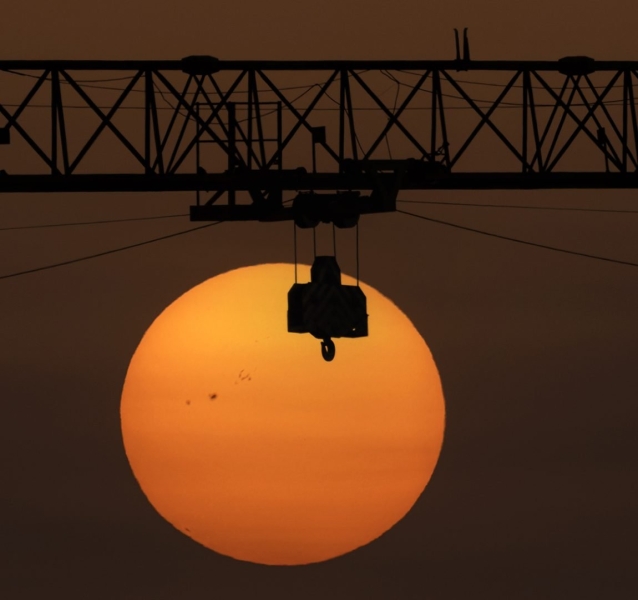
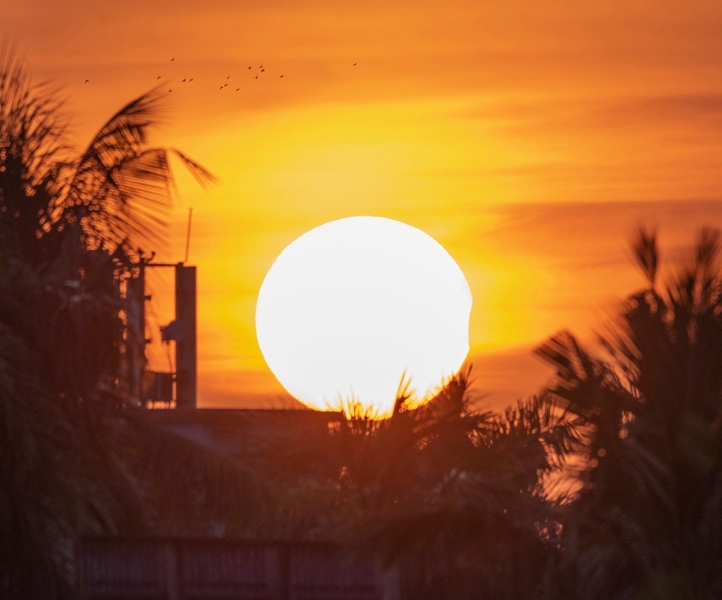
Include interesting landscape elements even in your solar images
Long exposures and stacking
Astrophotography captures celestial objects that are mostly dim. To properly capture those objects with your camera, we use long exposures to allow the photons to be collected in the camera sensor. Also, in order to make the image more detailed and reduce noise, multiple images of the same subject is capture and then stacked.
- Use long exposures and take multiple shots
- Software like Sequator, Siril, or DeepSkyStacker stacks those shots
- Stacking reduces noise and enhances detail
Star trails vs. pinpoint stars
Star trail images captures the movement of stars across the night sky as the Earth rotates on its axis. Milky Way or other astro-images require stars to remain pinpoint and sharp.
Star trails:
- Use multiple 30-second (or more) exposures continuously for an hour or two
- Combine in software like StarStaX, Sequator, or Photoshop
- The more images you capture, the longer the trails you will get
Pinpoint stars:
- Use tracking or shorter exposures (follow the Rule of 500 or the NPF Rule)
- Ideal for deep-sky and the Milky Way
- Take multiple shots without moving your camera
- Stack the images in Sequator, DeepSkyStacker, or Pixinsight
Pinpoint stars are necessary for deep sky and Milky Way images
[Related reading: How I started (and succeeded) photographing space from my backyard]
Processing Your Images
The final step to transform your images to a beautiful piece of art is the post-processing. In astrophotography, although planning and photographing are important, post-processing takes up a major chunk of your complete workflow. It is the stage where your RAW data becomes a presentable one.
Introduction to Lightroom for astrophotography
Although Lightroom is not the most ideal software for astrophotography, it is beginner-friendly. Lightroom is normally used as the first step of your post-processing workflow, where you can adjust the following:
- White balance
- Contrast and clarity
- Highlights and shadows
- Crop and straighten
Start with global adjustments before fine-tuning your image.
Step-by-step for noise, clarity, colour
Here is a step-by-step guide for your astrophotography processing in Lightroom:
1. Set white balance (3500 K- 4500 K for Milky Way)
2. Boost contrast and blacks
3. Increase clarity and texture
4. Reduce noise using the Detail panel
5. Adjust colors with HSL sliders
6. Use gradients or brushes for local changes
It is important not to go overboard with the changes. Over-editing your images is common mistake and it is easy to go beyond what is “required”. Play with the sliders until you are happy with it.
When to move to Photoshop
Photoshop can let you have more control over the images and explore your creativity. You can use Photoshop for:
- Stretching stacked images
- Layer masking
- Advanced stacking and blending
- Removing gradients or satellites
- Compositing and blending the foreground and sky
Photoshop gives you more control and creativity over your image
[Related reading: A guide to dedicated astrophotography processing software]
Inspiring Ideas to Try
The field of astrophotography is open to creativity. While your images can have scientific significance, it is also an artistic expression to tell a story. The night sky welcomes your exploration with the camera.
Framing with landscapes
Nightscape and deepscape images include landscape elements. Both the night sky and the landscape part complement each other, creating the final result. Try including interesting foreground elements in your images:
- Caves framing the sky
- Reflections in lakes
- Light painting trees or rocks
- Add a human element
Foreground not only adds depth, but it also conveys an emotion.
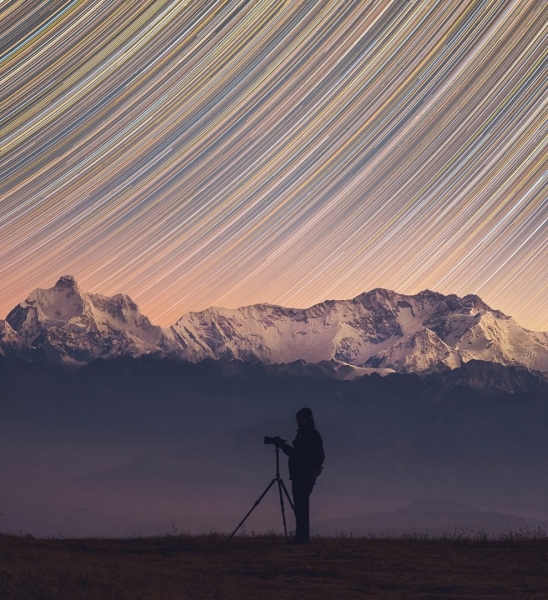
Human figure in the composition can make it interesting
Minimalist vs composite styles
Your images can be simple, portraying just the beauty of the night sky. Or they can tell a larger story: a story of Earth and sky, the merger of the ideas and expression.
Minimalist:
- One subject, simple framing
- Emphasis on color and shape
- Focus on simplicity
- Often, single images can suffice
- Can be scientific in nature
Composite:
- More focus on composition
- Blend and stack multiple exposures for clarity
- Requires careful alignment and blending
Both minimalist and composite styles have artistic value.
Ideas for storytelling with star
Astrophotography is the perfect platform for storytelling. It can be a story of the place, the sky, time, or even yourself. Going beyond the more common photographs, you can explore the following options:
- Time-lapse of the Milky Way rising and setting
- A series of moon phases
- One location through the seasons
- Night sky over cultural landmarks

Get creative with your astrophotography ideas
[Relared reading: Don’t miss these astrophotography opportunities in June 2025]
Resources & Next Steps
Finally, here are some of the resources and further readings that you can explore to grow and learn as an astrophotographer and sharpen your skills.
Links to tools and apps
- PhotoPills
- Clear Outside
- Light Pollution Map
- Sequator
- Pixisnight
- Stellarium
- DeepSkyStacker
Related resources
Here are a few further readings you can explore:
- All about astrophotography: Introduction to photographing the night sky
- All about astrophotography: Planning for a night’s session
- All about astrophotography: The art of shooting the night sky
- All about astrophotography: Processing astronomical images
- Five myths about astrophotography we are debunking today
- Urban Astrophotography: 5 things you can photograph from a light-polluted city
- How to plan for an astrophotography trip: Here is what to keep in mind
- 10 tips to take your star trail photography to the next level
Do not miss out on special celestial events like solar eclipses
Join the DIYP community and newsletter to be a part of a global community. Share your work. Learn from others. Get updates on tutorials, gear, and events.
Clear skies!