Contents

It feels like the summer season is right around the corner, and with it comes lots of exciting opportunities for travel. And yep, that means we can enjoy some travel photography too! Whether you’re shooting with a DSLR or Mirrorless camera or just your smartphone, we all want to capture those special moments from our trips. But let’s be honest, most travel photos end up being forgettable snapshots rather than meaningful images.
Travel photographer Leander Hoefler understands this struggle. He’s learned that great travel photography isn’t just about pointing a camera at pretty sights; it’s about storytelling, light, and simplicity. Here are his three key tips to instantly elevate your travel photos.
1. Think in Sets (Not Just Single Shots)
Most travellers take random photos of whatever catches their eye. While this approach isn’t wrong, it often leads to a disjointed collection of images that don’t truly represent a place. Instead, Leander recommends thinking in sets and taking groups of photos that together tell a complete story.
The Three Types of Shots Every Set Needs:
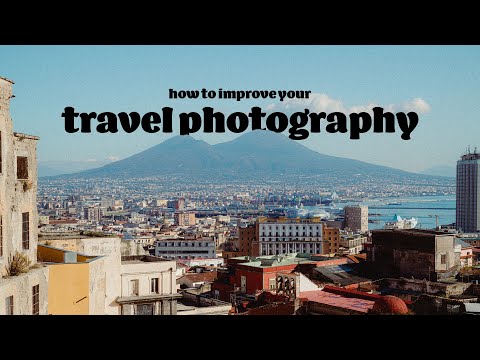
- Establishing Shots – These are the wide, iconic views that set the scene. A city skyline, a famous landmark, or a sweeping landscape instantly tells viewers where you are.
- Everyday Life Shots – These make up the bulk of your set. Capture street scenes, local culture, architecture, and people going about their daily routines.
- Detail Shots – These are the small, often overlooked elements that add depth. A close-up of street food, a weathered door, or a fisherman’s net can say as much about a place as a grand vista.
“Not every photo needs to stand alone,” Leander explains. “Sometimes an ordinary shot becomes powerful when paired with others in a set.”
2. Know Your Light (Don’t Just Chase Golden Hour)
Conventional wisdom says to shoot only during golden hour, the hour after sunrise or before sunset. But Leander disagrees. While soft, warm light is beautiful, limiting yourself to one type of lighting means missing out on other creative opportunities.
How to Use Different Types of Light:
- Front Lighting (Sun Behind You) – Flattens the scene but enhances colours. Great for vibrant street scenes or portraits with even illumination.
- Side Lighting (Sun at a 90° Angle) – Creates depth and texture. Ideal for landscapes and adding dimension to buildings or faces.
- Backlighting (Sun in Front of You) – Produces dramatic silhouettes and emphasises shapes. Works well for moody, high-contrast shots.
“Harsh midday light isn’t the enemy,” Leander says. “It can make colours pop and create bold, graphic compositions.”
3. Pack Light (Less Gear = More Creativity)
Ah yes, this is the one I really need to take to heart! It’s tempting to bring every lens and accessory “just in case,” but Leander swears by travelling light. A heavy bag isn’t just tiring, it stifles creativity.
“When your shoulders ache, your mind is too distracted to notice great shots,” he explains. “Some of my best photos came from trips where I only brought one or two prime lenses.”
Why Less Gear Works Better:
- You enjoy the trip more – Less weight = less stress = better photos.
- You move faster – No fumbling with lenses means you’re ready when a moment happens.
- You think more creatively – Limitations force you to find new angles and compositions.
Final Thoughts
Great travel photography isn’t about fancy gear or perfect conditions, it’s about storytelling, adaptability, and simplicity. By thinking in sets, embracing all types of light, and packing light, you’ll come home with photos that truly capture the essence of your journey. Check out the whole video below:
What’s your biggest challenge with travel photography? Let us know in the comments!