
Creating an astrophotograph requires planning, photographing the night sky, and careful processing. Combining all of these leads to an image that you may have envisioned even before you started doing any of these. One requires some patience and technical and artistic skill to achieve the desired results. In this article, I discuss stories and techniques behind creating an ISS solar transit image.
What is an ISS solar transit?
An ISS solar transit occurs when the International Space Station (ISS) passes directly in front of the Sun as seen from a specific location on Earth. This event happens in just a fraction of a second because the ISS moves at about 28,000 km/h. During the transit, the silhouette of the station, with its solar panels and structure, appears as a dark shape crossing the Sun’s bright surface. Capturing an ISS solar transit requires precise timing, a telescope with a solar filter, and a camera capable of high-speed imaging. These transits are rare for any location, so astrophotographers use tracking tools and predictions to find the best spots and times to photograph them.
Planning
The essence of an ISS solar transit lies in its planning. Thanks to some websites and apps, the task becomes easier for us, astrophotographers. In January 2025, I came across that an ISS transit is going to take place and will be visible from my location. Initially, I wasn’t very hopeful since it was too early and ISS may change its path in between. I kept checking the prediction website every day and the path seemed to stay the same.
This was certainly good news for me. I had planned for such transits many times and they never turned out well. At times due to the changed path of ISS (the transit never happened) and the rest of the time, the weather was to blame. This time, however, the weather report brought good news with clear skies ahead. The transit was supposed to happen on 11th February when the sun would be 25 degrees above the horizon. This was a perfect opportunity for capturing my first ISS solar transit.
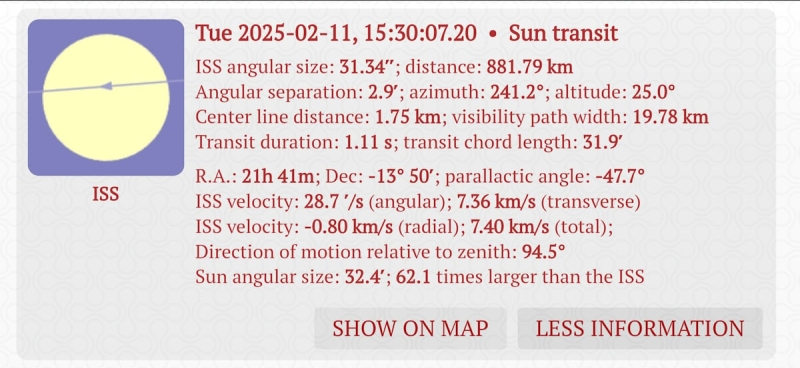
Details of the transit as shown on the ISS Transit Finder website
Photographing
On the transit day, however, I completely forgot about it. As I was engaged in a few other things, on 11th February, I somehow did not realize that the transit was taking place that day. It was only 15-20 minutes before the transit that I suddenly remembered that I had a transit to capture. I immediately rechecked the website and started running. Yes, I was running downstairs to grab my equipment.
To photograph this event, I chose my Sigma 150-600c telephoto lens as it would give me the maximum reach among my lenses. The larger the focal length, the better it would be to capture the event. For choosing my camera, I had two options: the Nikon Z6ii and the Nikon D5600. The Nikon D5600 would have given me further reach due to its smaller sensor (1.5x crop factor). However, I required a camera with a higher FPS rate. While the Nikon D5600 would have reached a maximum of 3-4 FPS, the Nikon Z6ii would have given me more than 10 FPS. Although it would mean that I had to settle with a full-frame sensor with a lesser reach for the sun (no crop factor), I decided to go with the Nikon Z6ii.
Thankfully, I had to set up on my terrace and my initial set-up with camera, lens, and tripod was done in under 5 minutes. The next thing I did was to attach the solar filter (I used a Thousand Oaks White Light solar filter) and focus on the sun. Focusing on the sunspots worked best for me. After focusing, I took a few test shots to decide on the exposure. Bumping up the ISO allowed me to get a shutter speed of less than 1/1500s, perfect for freezing the fast-moving ISS. I went with the DX mode in my camera to reduce file size. I also choose the Continuous H (extended) mode to get the best FPS rate.
As I was aware of the exact timing for the transit, I began to shoot 2 seconds before the transit and continued for 3 seconds after the transit. I kept the shutter button pressed for 5-6 seconds in total, giving me a total of 62 images. The event was not visible to the naked eye. It was only when I reviewed the images that I was confirmed that I had finally captured the transit. And guess what, I was very happy about it!
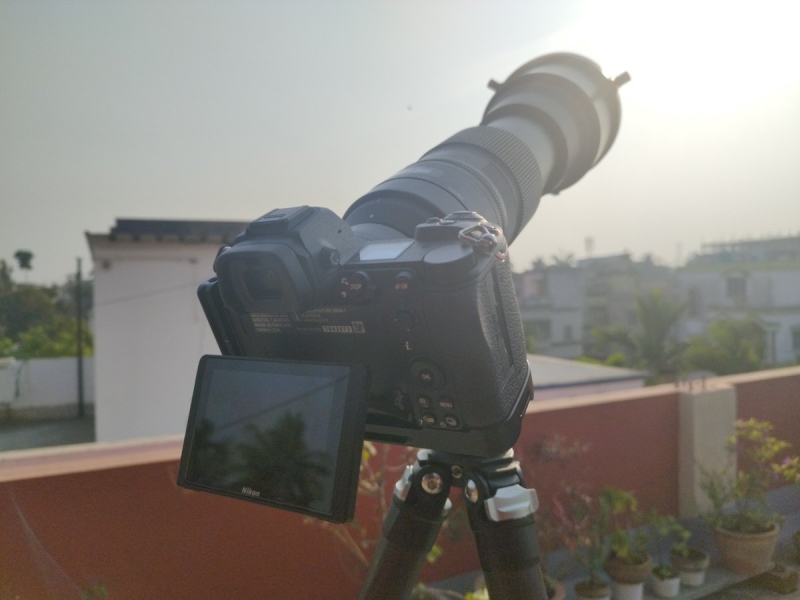
Photographing the transit event from my terrace
Processing
The pre-processing of these images was done following the path of lunar or solar photography, with only one additional step. Since PIPP wouldn’t directly recognize the RAW files from Z6ii (not sure if this is a standard issue or an issue with my version), I had to load the 60 images to Photoshop as layers, and then save the layers as individual TIFF files. These files were opened in PIPP software for rough alignment and cropping. I intentionally made the images monochrome during this step to add false color later.

The stacked output from Autostakkert
The next step was to stack these files with Autostakkert and this gave me a single stacked image. Note that this was done to get better details of the solar surface. Due to stacking, the ISS was no longer existent in the image. I took this stacked file to Photoshop and processed it for sharpness and global highlight/shadow adjustments. I then added all the images with ISS on top of this layer and chose the blend mode “Darken” (remember that the images were already aligned by PIPP). Finally, I added some false colors via level adjustments.
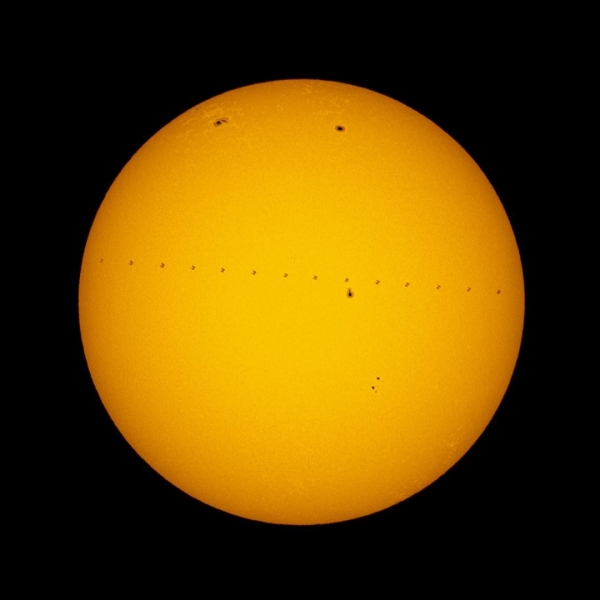
The final image
I also created an inverted image and annotated the sunspots on the solar surface.
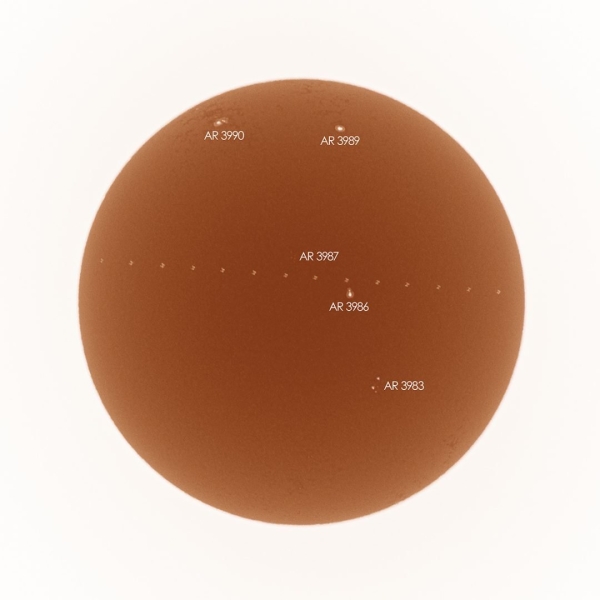
The inverted and annotated version
All you need to do is keep an eye on the ISS transit finder websites and apps and grab the next possible opportunity. Clear skies!